
I’m so excited to start sharing reveals and progress on our spaces here!
With every reno we’ve done, I’m so excited to have new blog material. But the season right around packing, finishing the house to move in, moving in, and initial settling is always a little quiet around here. Creating all that material plunges me into a bit of a blogging black hole, especially now that there are two babies thrown in the mix. BUT, we’re slowly and surely getting settled and there is SO MUCH TO SHARE, y’all! I’m thrilled for this fall to really share how this home comes together.
The bathroom made major progress during that phase of packing and moving since we had to have it to use…hello one bath house. I said in last week’s bath design plans post that bathrooms usually present such a challenge for me! They’re so functional and usually have such little room to layer on all the fun style I love. But I worked hard on this one to create something with lots of personality and it’s shaping up to be my favorite bath we’ve ever done….and this is the seventh one we’ve done! How crazy is that, y’all?
I’ll be officially revealing this space very soon! I decided it was about time to start the fun Buffalo Stone Cottage reveal train that’s coming our way over these next few months. Y’all have been ever so patient while we renovated and moved, so get excited! It’s coming…but before we get to the reveal, I wanted to share the phases of progress on this bath so that you guys could see how the design plans started coming to life!
Okay, let’s see the lovely orangey befores again so it’s fresh in our minds.
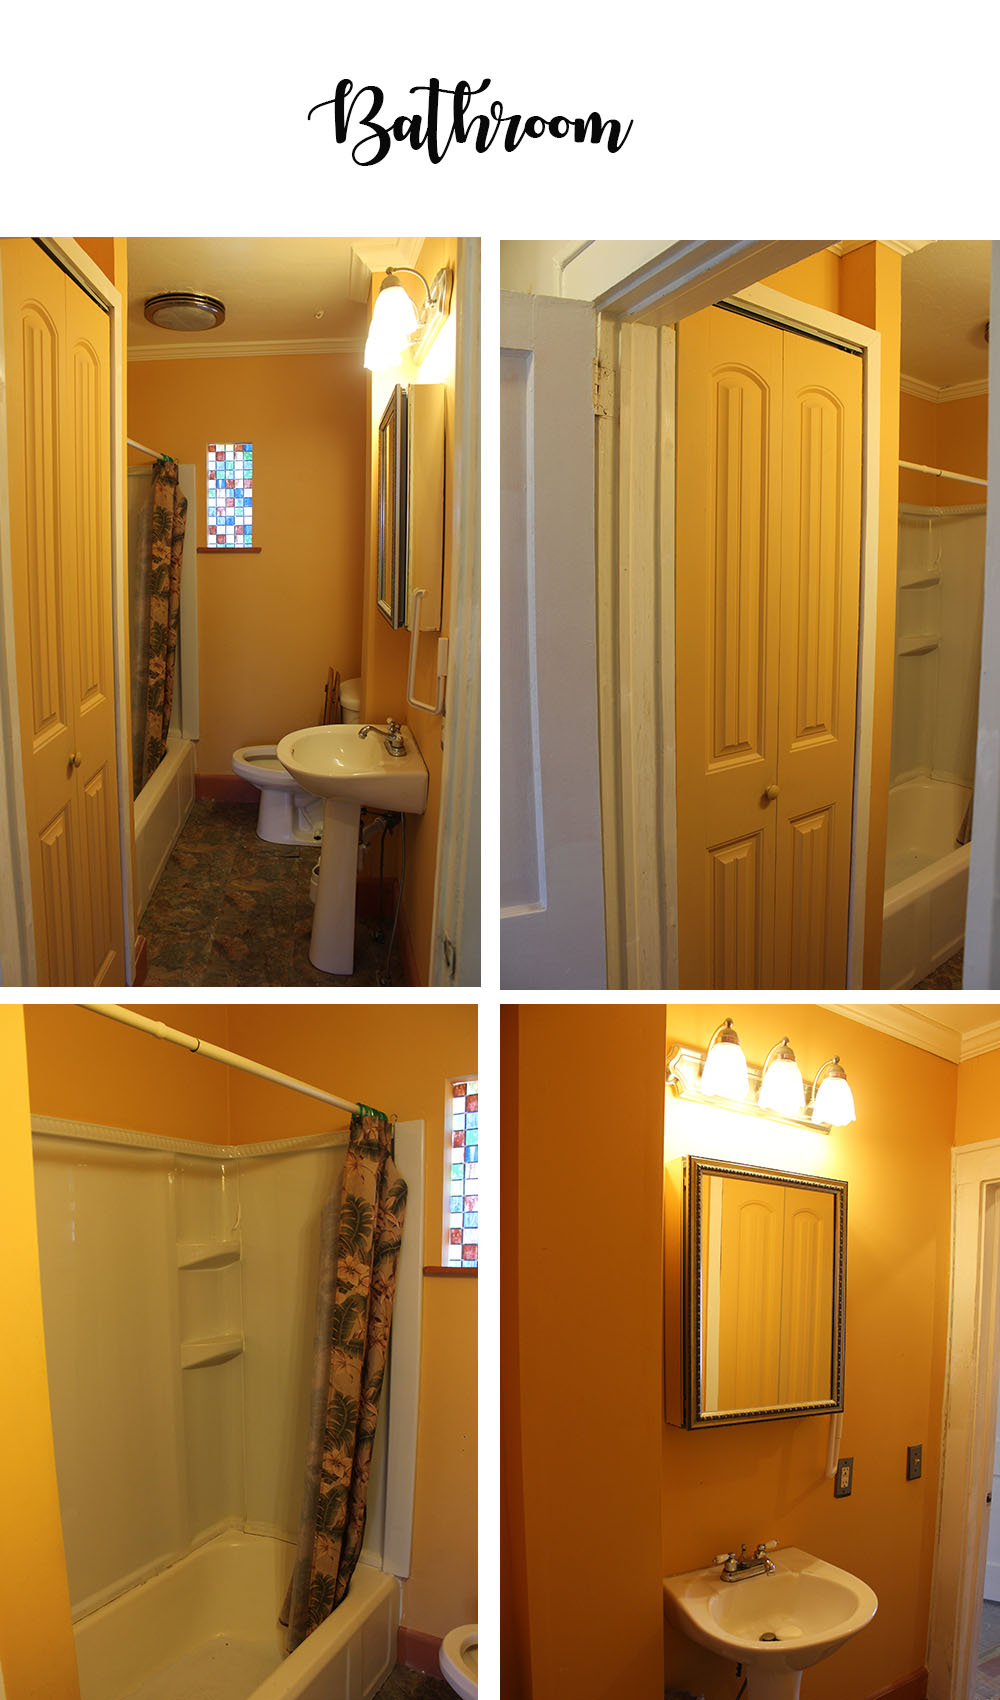
As I said in last week’s post, baths in old houses are tricky. Sometimes they look horrible and all the damage they’ve withstood is visible. Sometimes the room is okay and you wonder what’s lurking behind those walls. Well, this one looked worse in person, believe me. But we’ve learned that gutting baths is the way to go with old houses (especially that were rentals and not well maintained) because we’ve found EXTENSIVE water damage in every single one.
Here’s what we found in this one when we ripped up the linoleum floor…
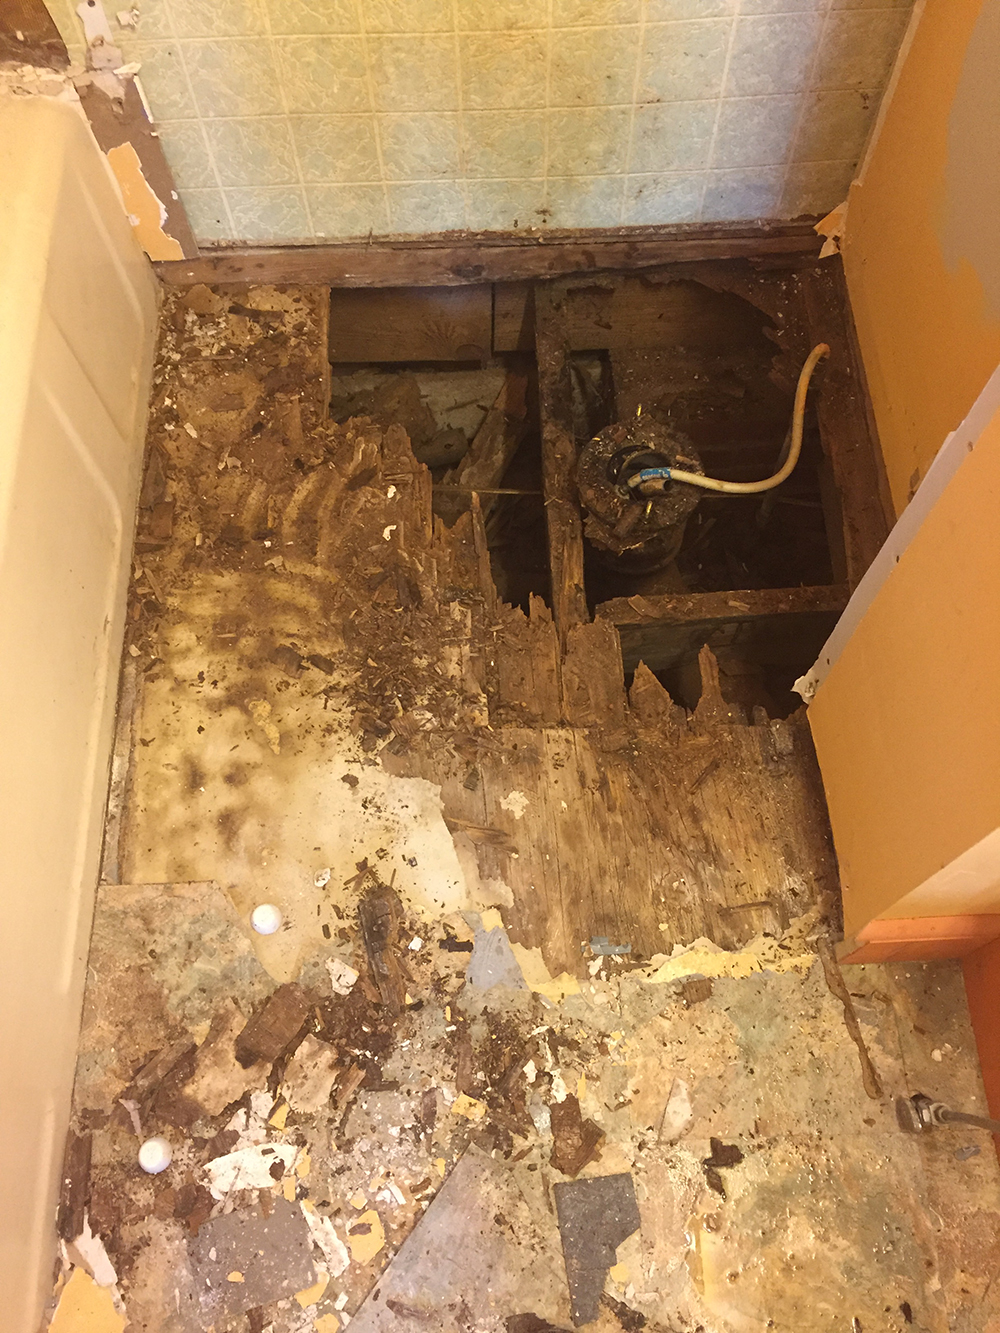
Yeah, it was rotted all the way through. Look hard and you can see dirt…like under the house, in the crawl space, GROUND.
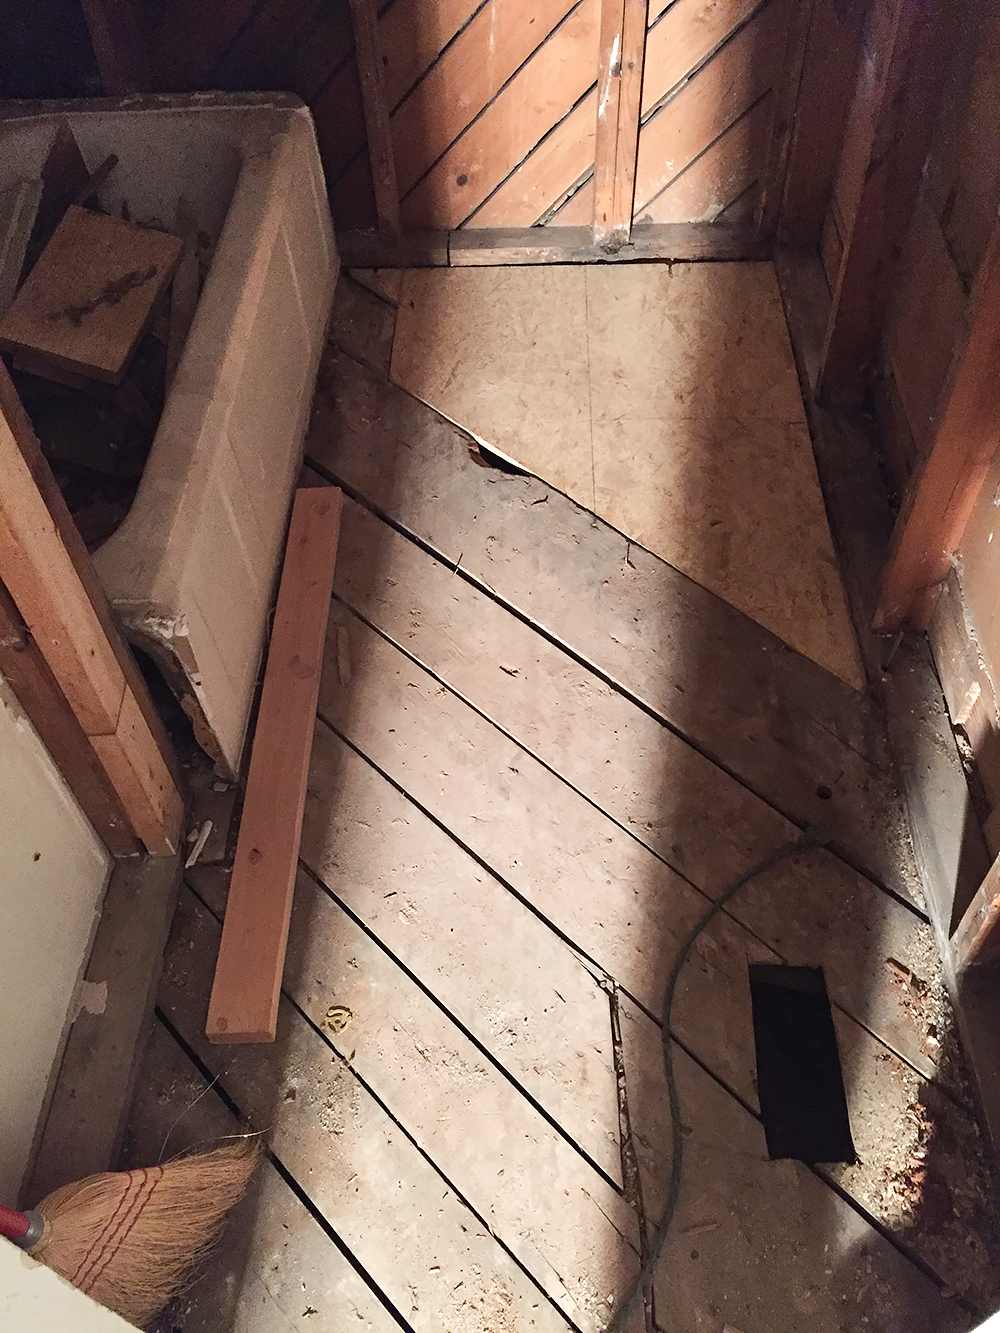
We gutted the entire space and then first on our list was repairing and reinforcing the floor. Tiling the floor was one of the first things we had to tackle and we needed it safe to walk and work on.
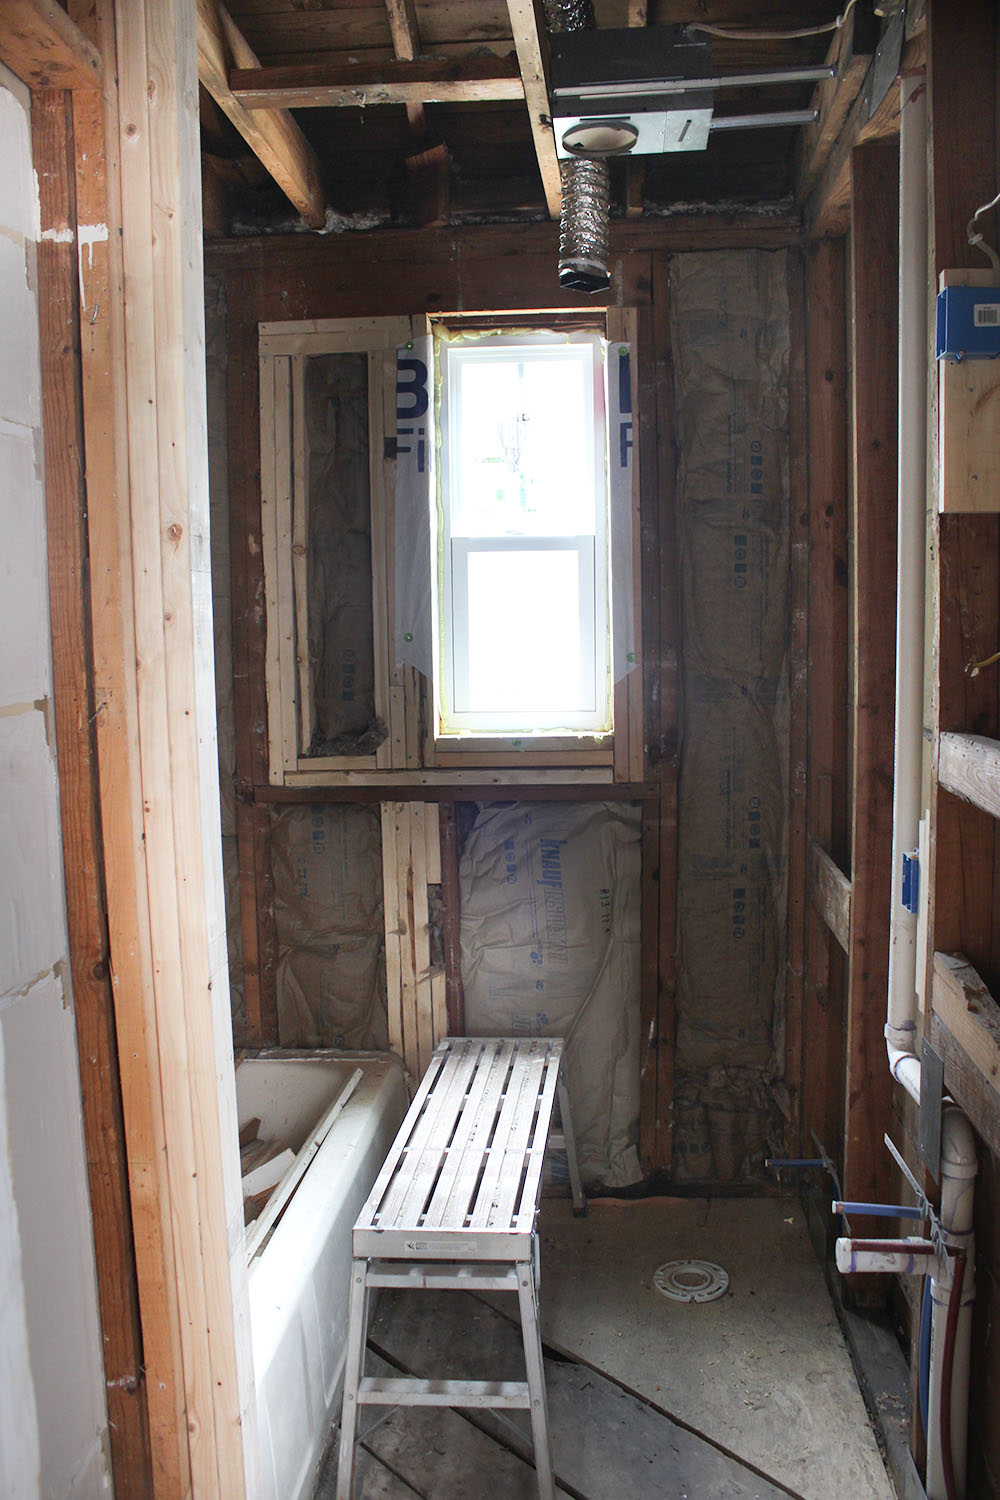
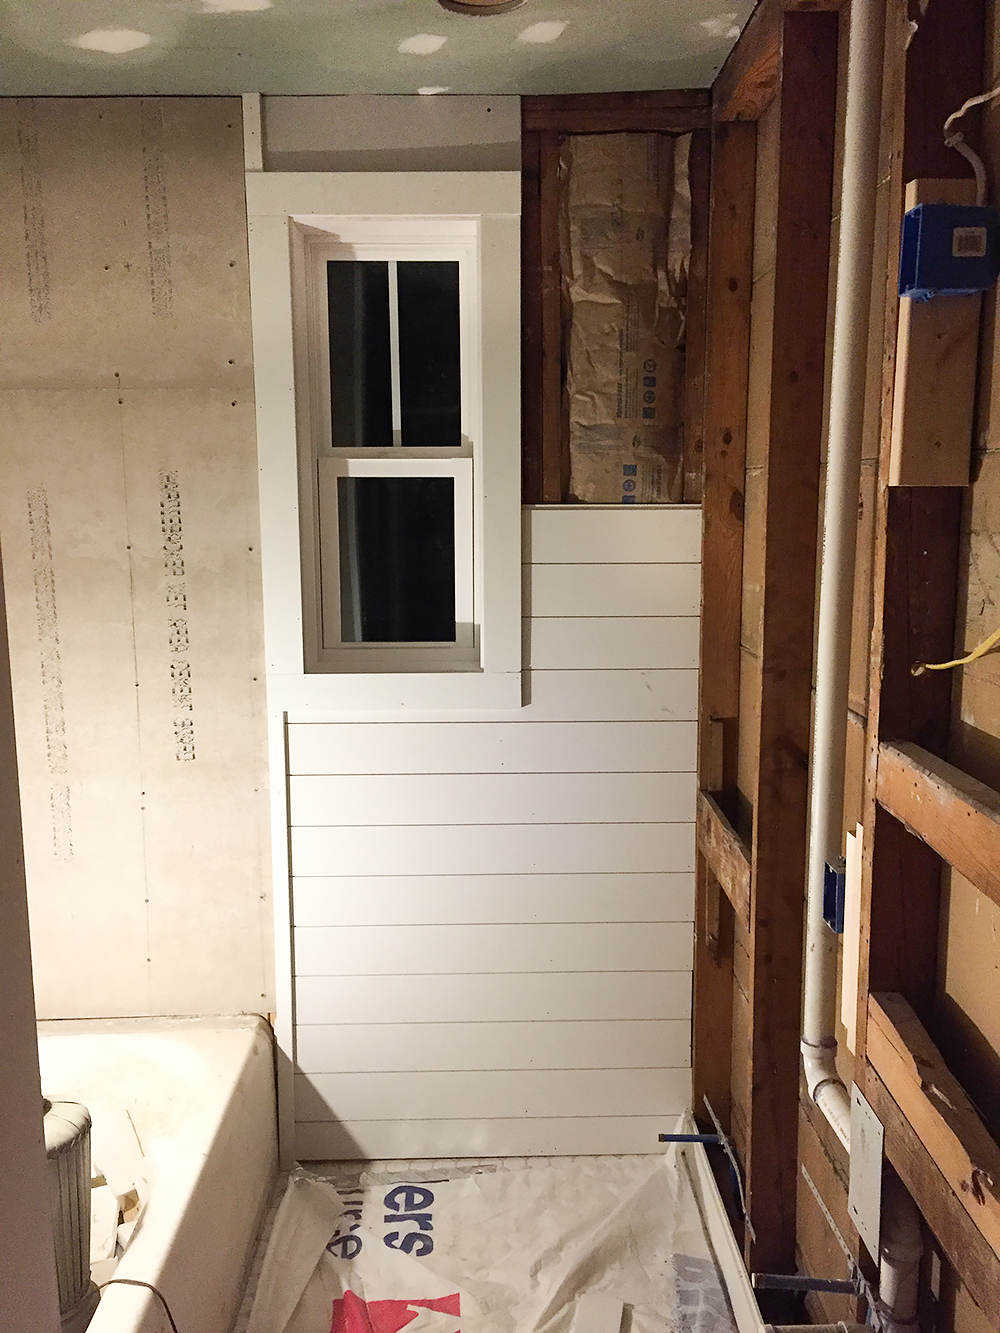
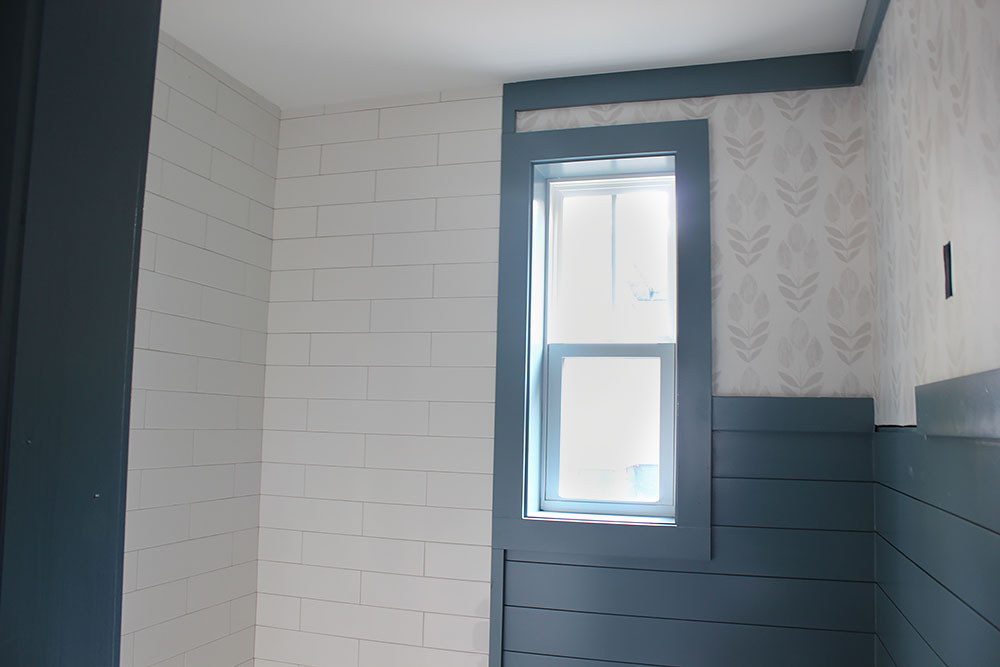
Once the floor was reinforced, we opened up the window frame as big as possible considering the shower tile and framed out and installed the new window.
Next came the tile floor.
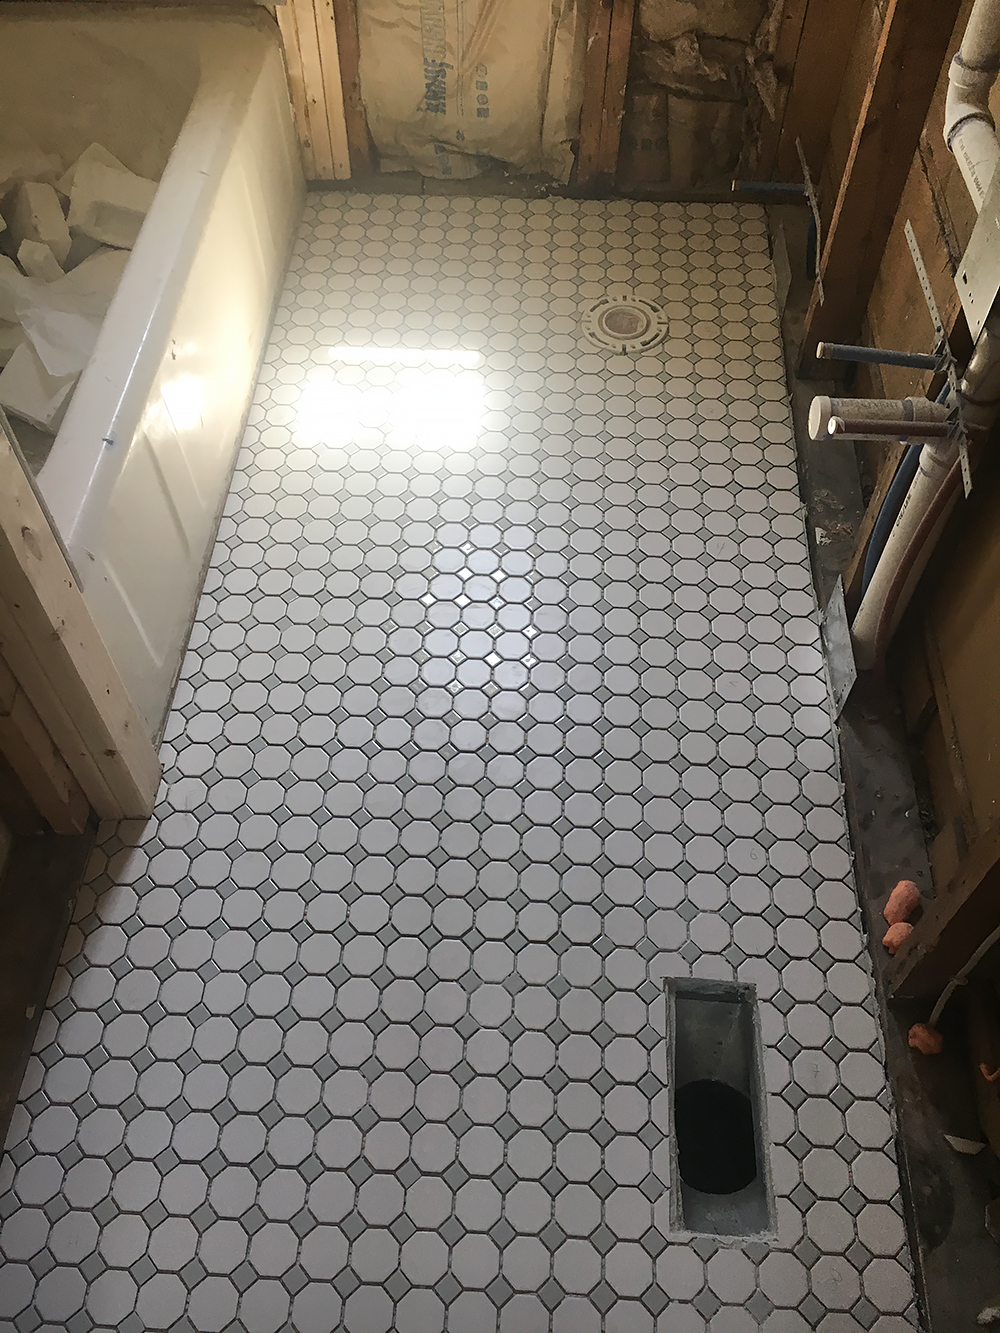
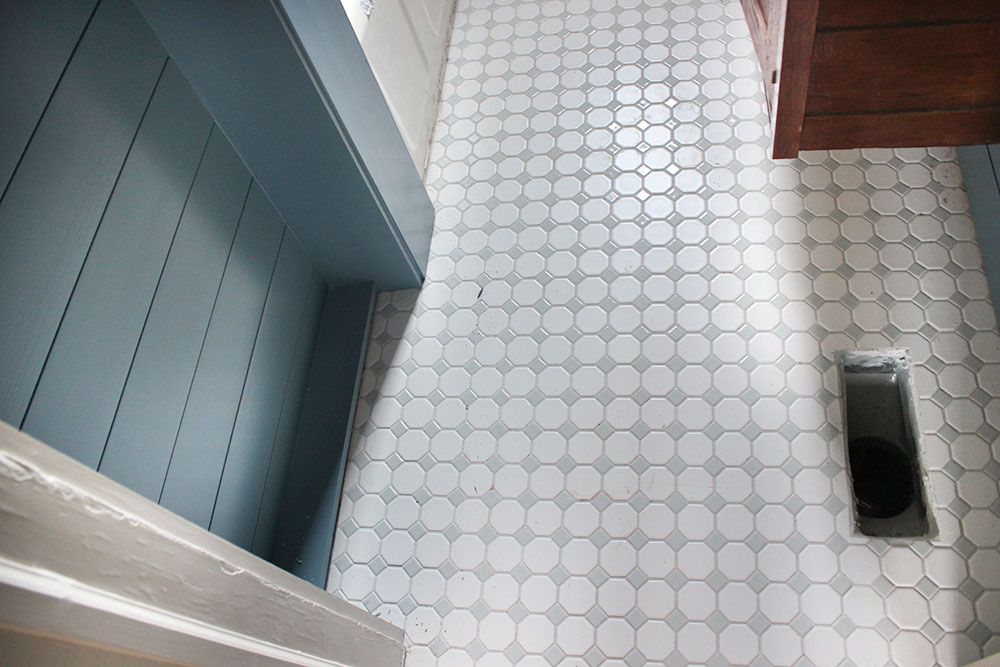
I’d pictured something that could’ve been original and this white and gray honeycomb reminded me a lot of an original tile we had in a bath a few houses ago. But I loved the updated feel of the tan/gray diamonds breaking up the white hexagons.
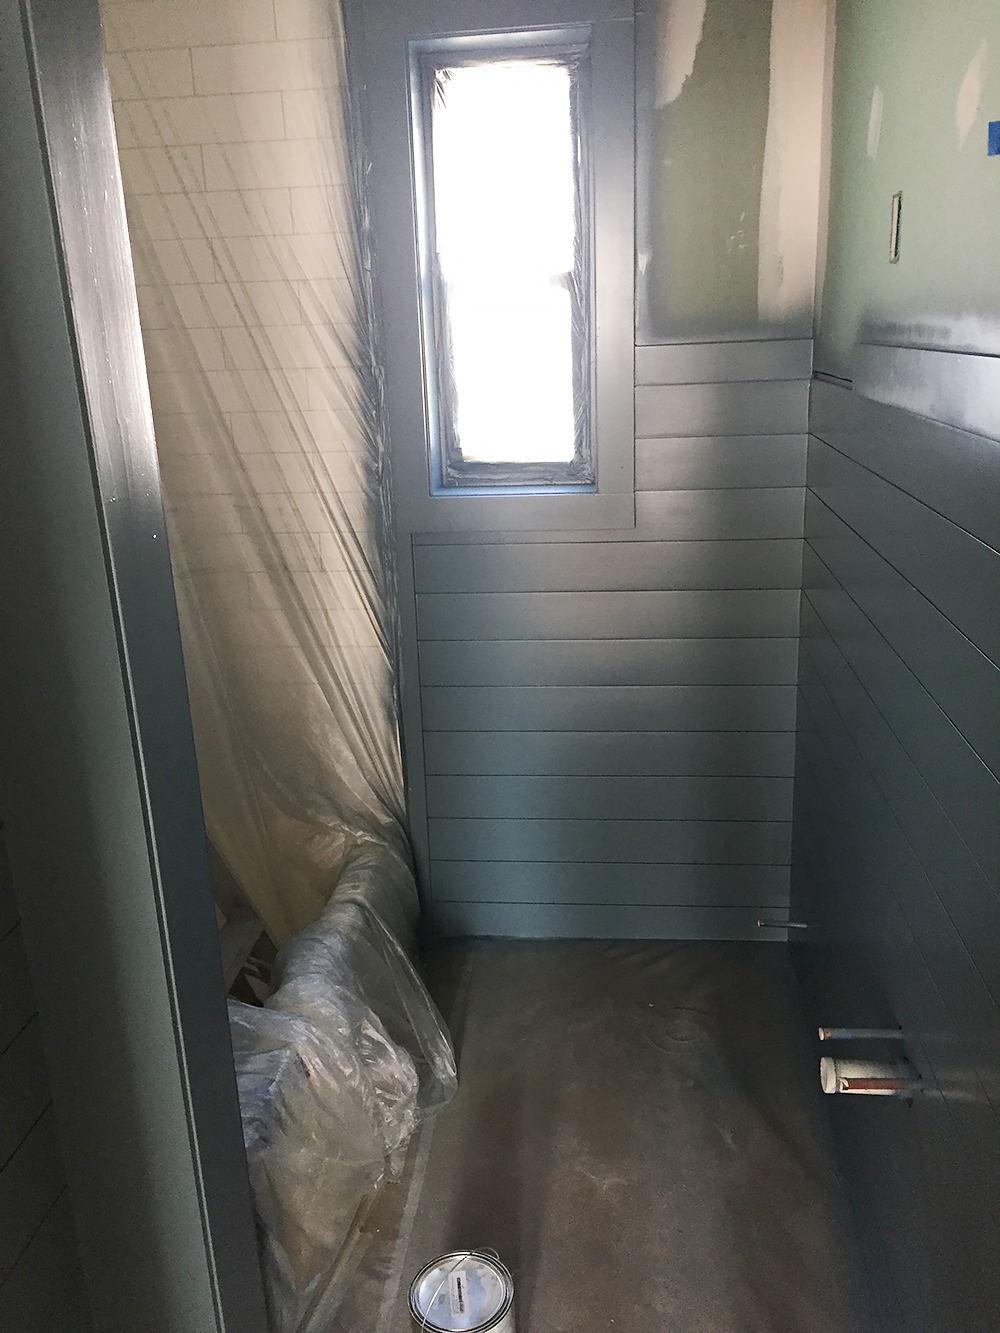
After that, Chris started working on carpentry. I pictured shiplap 3/4 of the way up to add lots of charm and character.
As soon as it started going up, I was in love. The great thing about nickel groove shiplap (where there isn’t a true gap in between boards – think tongue and groove) is that you don’t have to have sheetrock behind it. So if the space is gutted, as ours is, it doesn’t add as much cost as you’d think to just replace drywall with shiplap, especially in a small space.

The shiplap against those floors is just so good to me!
Then, the over-sized white subway tile was installed as the shower surround.
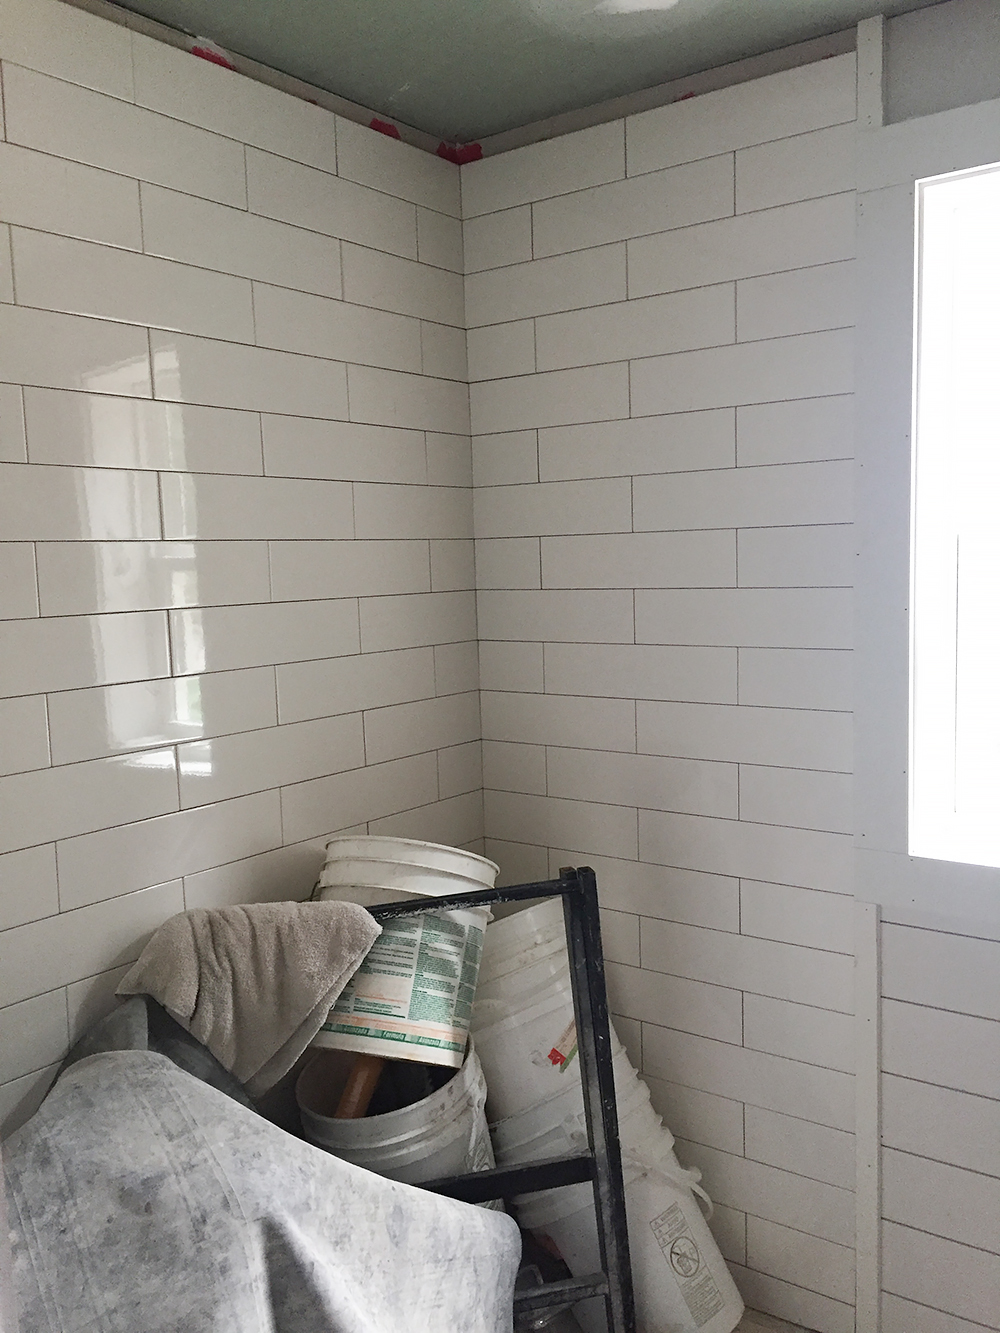
We went all the way to the ceiling with the surround. I like that design-wise because I think it looks cleaner. It’s sort of like how I like hanging curtains at the ceiling…it doesn’t break up the room visually and makes the ceilings look much taller. But it’s also better to me functionally. I always worry about water damage above the surround in a shower. This is worry-free.
And once all of the carpentry and tile were done, it was time for paint. I wanted a blue/gray like our fireplace and we ended up going with Valspar’s Nordic Blue.
We hired out all of the paint in this house…they can do in a week what we can do in two months with kids and we were on a super tight timeline. We wanted it all painted and ready before we moved in with the babies too.
They sprayed the trim in the bath with a semi-gloss so that it’s more durable and cleanable and I like for my trim to have a little shine.
All the heart eyes over that color on the shiplap!
We love using vintage pieces wherever we can because it just adds so much age and character. We were in a bit of a dilemma when choosing a vanity because we wanted something with storage, but we had very little space to work with. We needed something that was very narrow, so it didn’t take much depth in the room. We also wanted something that was a bit wide to maximize storage. And we really wanted a piece with character.
We did a lot of searches on ready-made vanities and there weren’t any that fit the dimensions we needed to maximize function in this space. Most everything we found was too deep…we needed around 15″ deep.
We came across this vintage washstand at our new favorite spot in Greenville: Route 276 Cool Crap. How awesome is that name? You just know they have good stuff. We ended up finding quite a few vintage pieces to maximize character and function in this house! But back to the vanity…
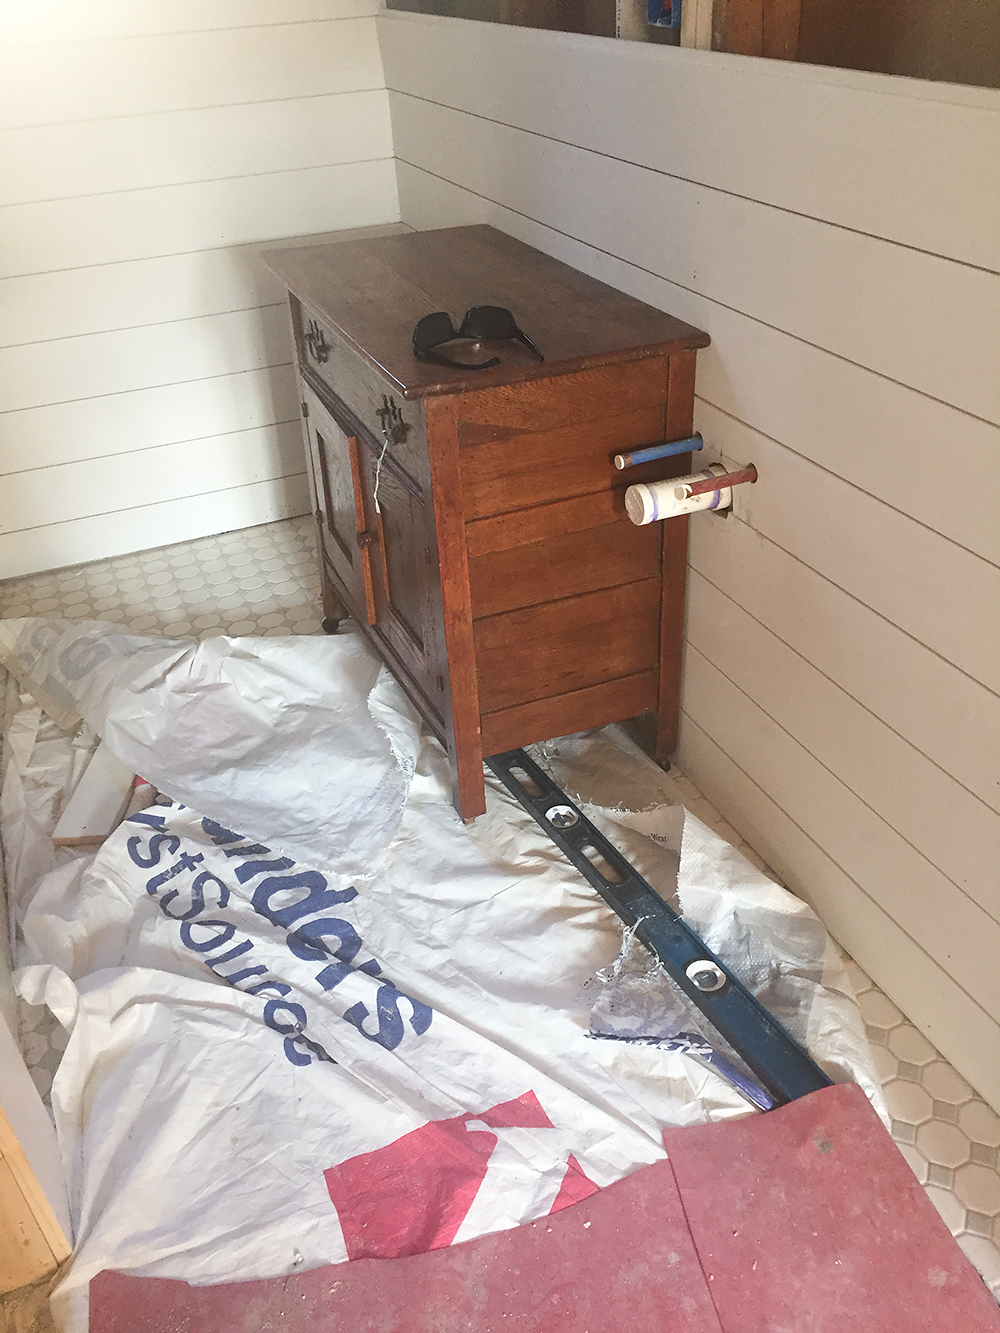
This washstand was the exact depth and width we’d wanted and it gave us storage. It has a great drawer and then doors that open up underneath. And it has so much character. I really wanted a wood element in here and this one is perfect.
The only issue was it was way too short. We brainstormed and came up with a solution that let us choose the perfect height for us! We decided to take a cue from more modern floating vanities and cut off the legs so we could mount it to the wall. We’re tall in this house and needed about 10″ more than those little legs could give us to make it comfortable for us to use.
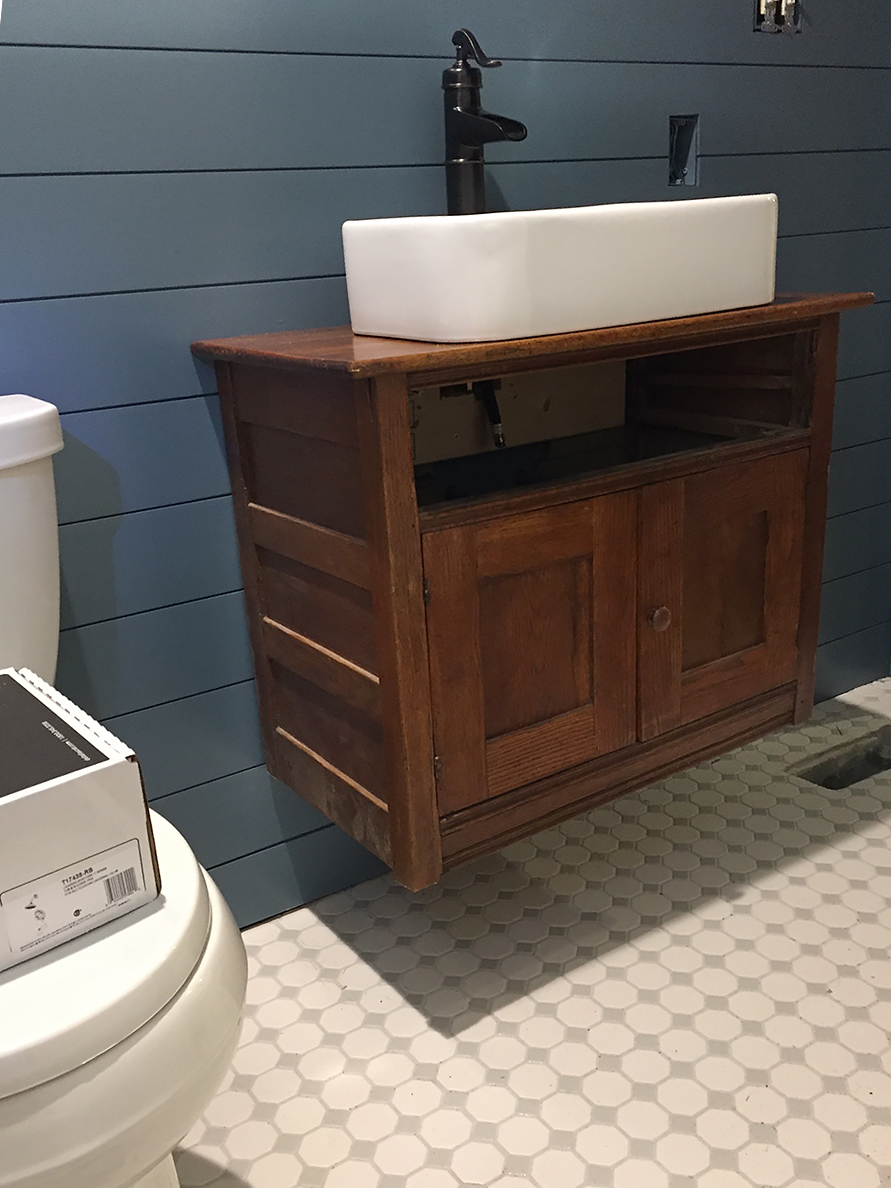
We’ve had wood vanity tops in every house so far and we’ve never had an issue with wear. We do extra coats of poly and then make sure not to leave standing water around the sink when we can help it.
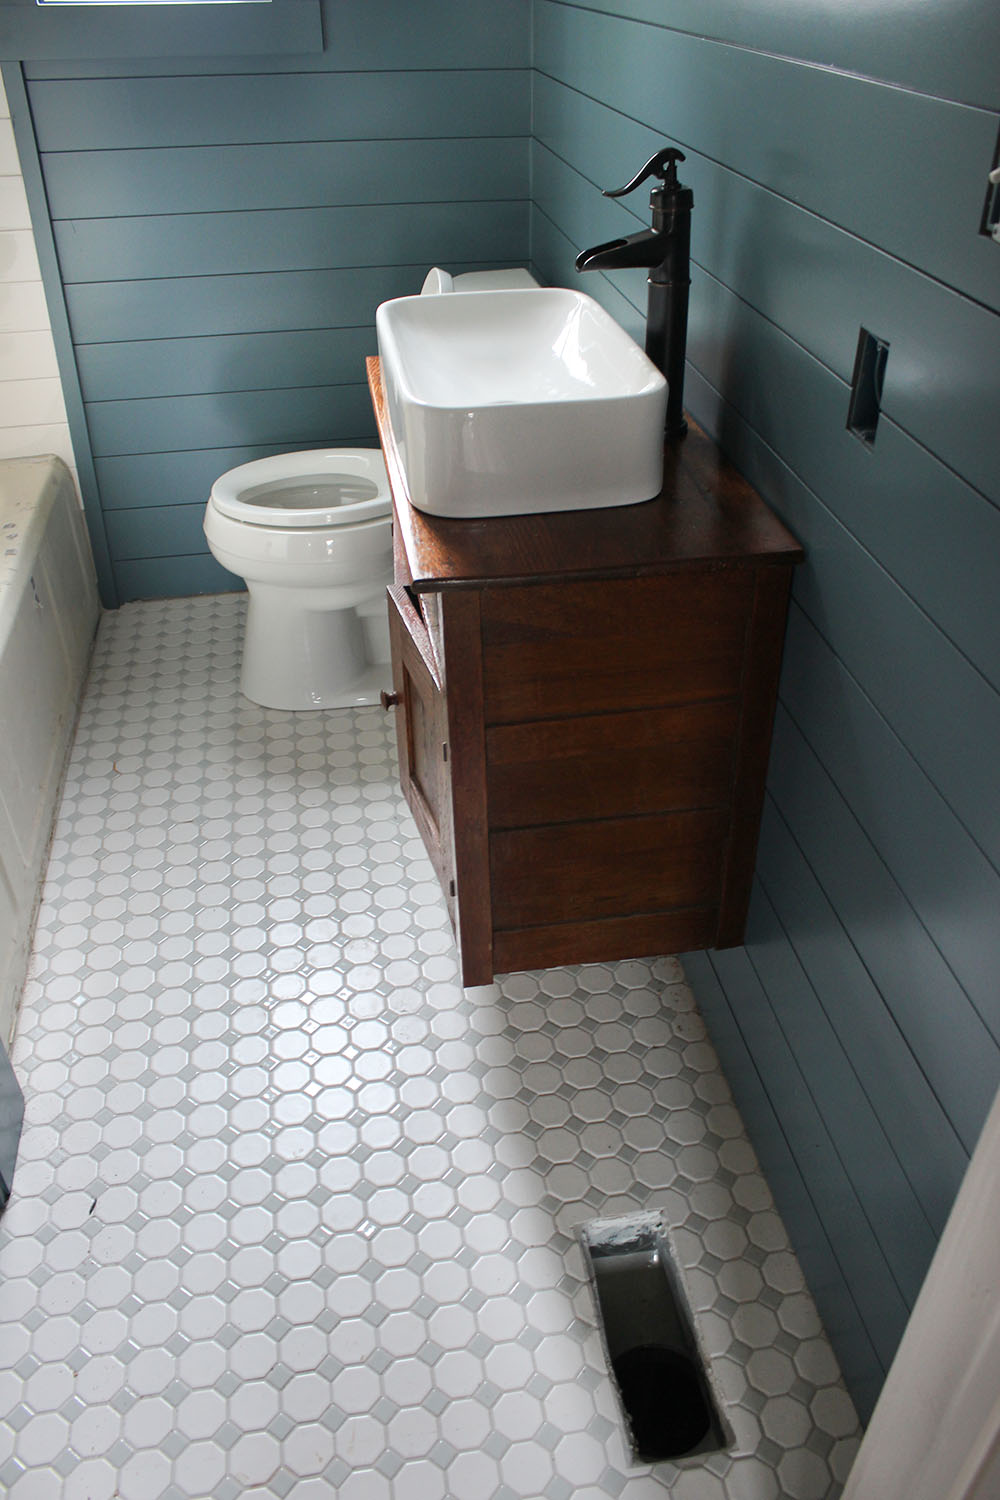
I love the blue shiplap against the tile floor. I think the details, finishes, and texture paired together is what make me so happy in here.
And the wallpaper we chose against that color? Stop it. I just looooove it, y’all. Who wants a little glimpse? I can’t wait until the reveal, it’s just too good!
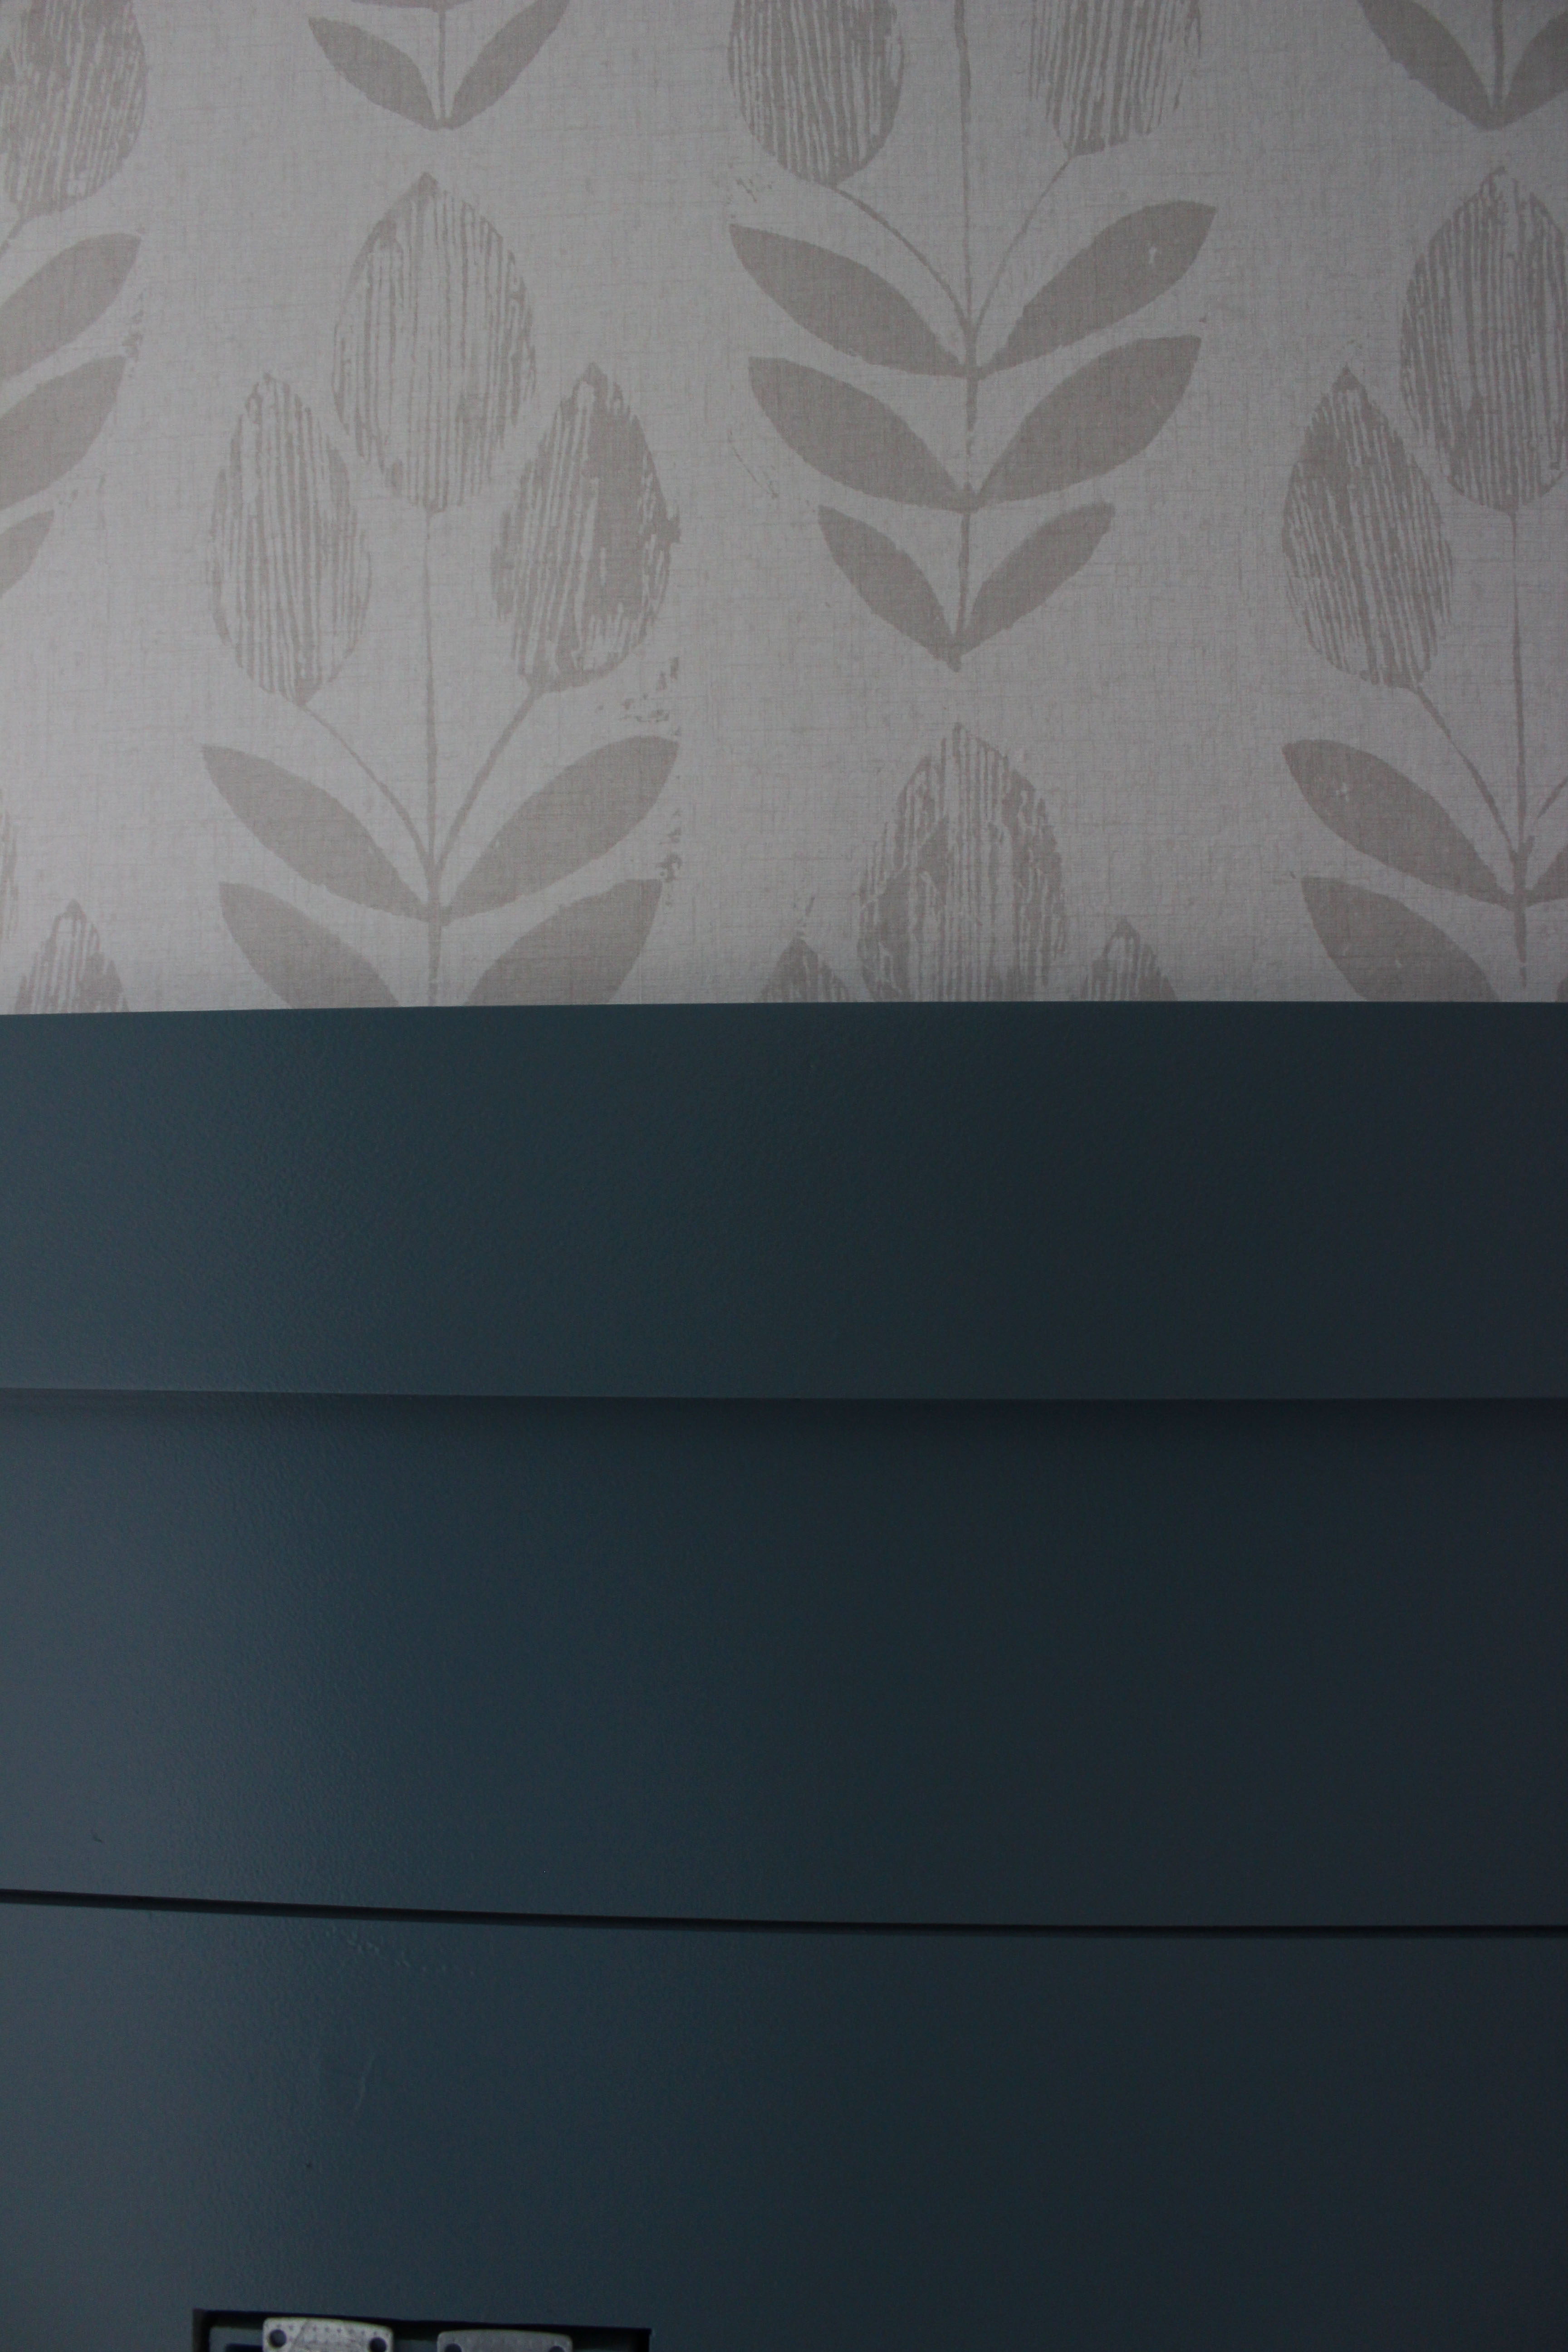
Okay, okay, one more!
Alright, that’s all on this space until the big reveal! I can’t wait to share this finished space with you, friends!
This room is designed in partnership with Lowe’s. All design ideas and opinions are 100% my own.

Stop!!!!!! I kinda don’t like you right now… excuse me while I go rip out our bathroom. I’m seriously dying over all of your choices, you are a genius!!! ? Kim
I loved the shiplap white, but the blue is amazing!!! I can’t wait to see the finished product. Did you use the same tub that came with the house? And that floor is beyond perfect!
Thank you so much, Ashley! I’m so happy everyone is loving it so much! I definitely am 🙂 Yes, the original tub was cast iron. It was in horrible condition, but we had it re-glazed and it looks good as new! So much cheaper than a new tub for even half the quality of cast iron! We always have preserved the old tubs and are always glad we did!
Amazing!! I love the washstand ( my parents have two that are near identical). So smart to cut off the legs and I love the way it looks floating!!
Thank you, Ann! We really struggled over that one because my husband was really worried it wouldn’t look right floating, but it just had to happen. It was way, way too low and I love it now! I envision scooting a little kids’ stool up under the base of it 🙂
Beautiful. I LOVE the blue shiplap and I am a very white/neutral girl, but it is so stunning! I can’t wait to see the finished product, although sneak peeks and a slow unveiling makes it so much fun to watch!
Thank you, Sharon! It’ll be revealed next week, so you won’t have to wait too long! I really packed a lot of progress into this one post, but am excited to get y’all caught up and the reveals rolling!
oh…my…gosh… That looks so GREAT!!! I love a lot of contrast, and that blue shiplap against those white tiles is the best. I also love adding wood elements and that vanity is perfect. And the wallpaper?! So, so good. I can’t wait to see it finished!!!
Thank you so much, AManda!!! I am so happy you love it! IT’ll be revealed next week 🙂
Lindsay!!!!! It is looking amazing! You definitely achieved that layered look you were going for. I love so much about what you’ve done. I didn’t know about the shiplap not needing drywall so one day when we really go after our bathroom, I may have to use that trick! And, I will definitely be checking out y’all’s new favorite spot for furniture! That vanity is gorgeous. Like everyone else, I love it – it looks amazing!
Yes!!! Shiplap is the way to go! I want to do it everywhere and Chris keeps reminding me it would really add up vs. drywall for a giant space. 🙂
I LOVE all of your choices in this small bathroom Lindsay! It makes me want to renovate another house…lol. I can’t wait to see the rest of the house as you complete the renos. Welcome back. 😉
Hahha, thank you so much Kathy! So happy you love it 🙂
Love the bathroom. The blue ship lap is gorgeous.
Gosh, thank you, Pam! I have to admit, I’m LOVING hard on this blue shiplap 🙂
Here’s the funny thing…. I’m not a fan of blue OR wallpaper but I’d take this bathroom in a heartbeat. All of your choices just work so well together….the synergy is just wonderful!
OH my goodness, that is the biggest compliment! I’m glad I made you a believer in this case haha! Thanks so much girl!
I love this! Would love a tutorial on installing the shiplap and details about what you bought and where! Our bathroom is down to the studs now and I think we will do this instead of greenboard!
Yay Courtney!! I’m so glad you love it! We got all the boards at Lowe’s!!! And my husband installed them, so I’ll chat with him and try to include some how-to info in the reveal next week!
I would love that! I’m so ready to be done with our space!
I’ve been ITCHING for updates, constantly checking your page ha ha. So worth the wait! Will y’all do quarter round or anything to close the gap between the shiplap and the floors? I know the floors/walls aren’t always totally flush in old houses, so I didn’t know if you had a solution to deal with that. Already looking so pretty!
This is gorgeous! I love how it’s coming together. It’s crazy how small it looked in the before photos and now looks much more spacious! I just love your design aesthetic and can’t wait to see the results!! ??
Thanks so much, Christina! I’m so happy to hear it looks spacious 🙂 It’s a tight one for sure!!
This looks great! I love how you paint the trim the same color as the walls in your home or in this case the shiplap. You may have already answered this, but what is the material you used for the shiplap? Is it just called nickel groove shiplap at lowes? I’m considering doing a similar treatment to my little bathroom too but can’t decide on the right material. Thanks!
Hi Michelle! It is called that, I believe! It’s basically tongue and groove so they fit together rather than leaving space in between boards. If you describe that, they will definitely be able to help you!!
This is such an amazing post. Thanks for sharing.
Hi Lindsey, I love the vessel sink!! I’m looking for one to put in my kids bathroom. What do you think about it and where did you get it? Thank you!