
This is a sponsored post by Lowe’s Home Improvement. All opinions are 100% my own.
We’ve had open shelves in every kitchen we’ve ever designed. We’ve never had a single upper cabinet! And we’ve loved it. I knew I wanted some sort of open shelving in this kitchen, but I wanted to do something a little different than our norm. I fell in love with this picture of a Belgian kitchen as soon as I saw it! I loved the collected feel, the texture, but I especially loved the upper cabinets.
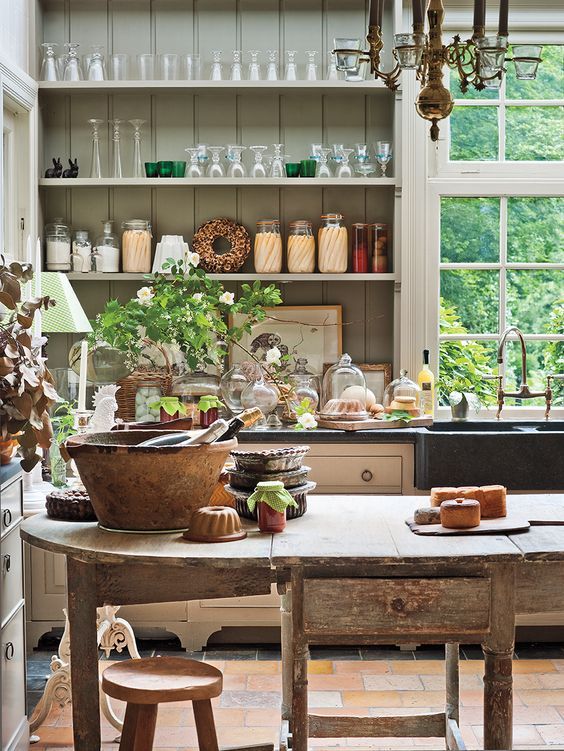
I loved that they were a separate cabinet, brought in some color, and visually went all the way to the ceiling, but still had the open element I love. I also love symmetry in a kitchen and I could just picture two of these cabinets flanking some awesome patterned tile. And the vision was born! I know you guys have seen the reveal of these painted cabinets in the tiled hood post, but have to take a minute to bask in this transformation!
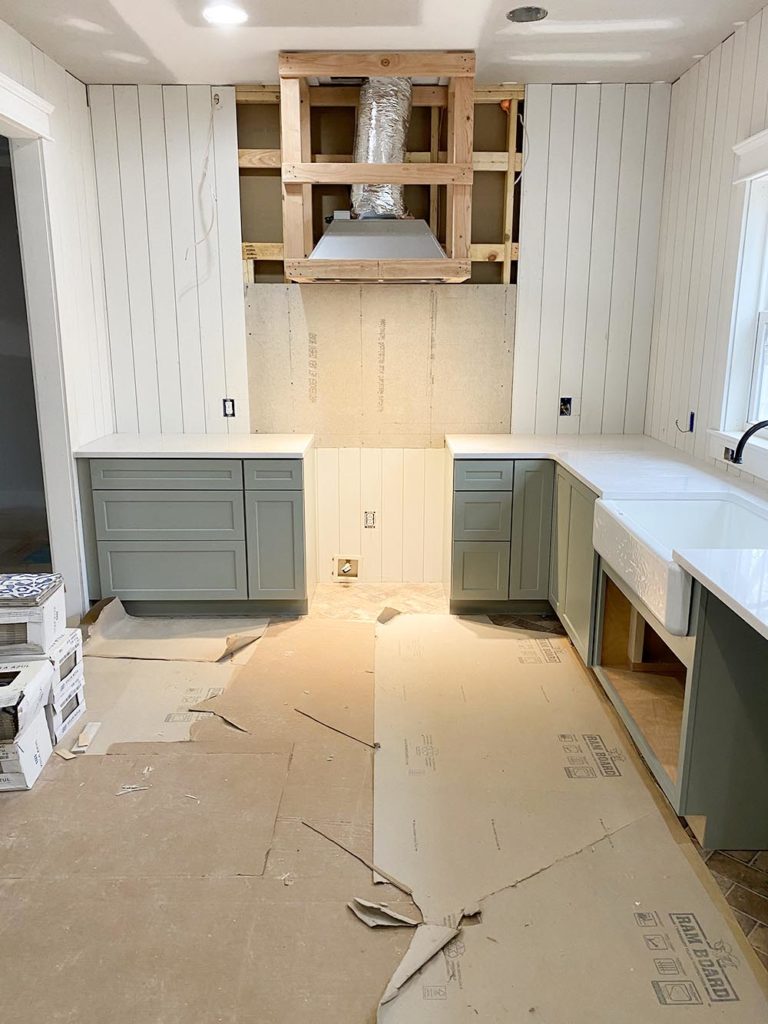
We’ve come such a long way in this space! Today, I wanted to give you guys a quick tutorial on how we made these upper cabinets. They were extremely similar to the DIY Built-ins we did for the dining room.
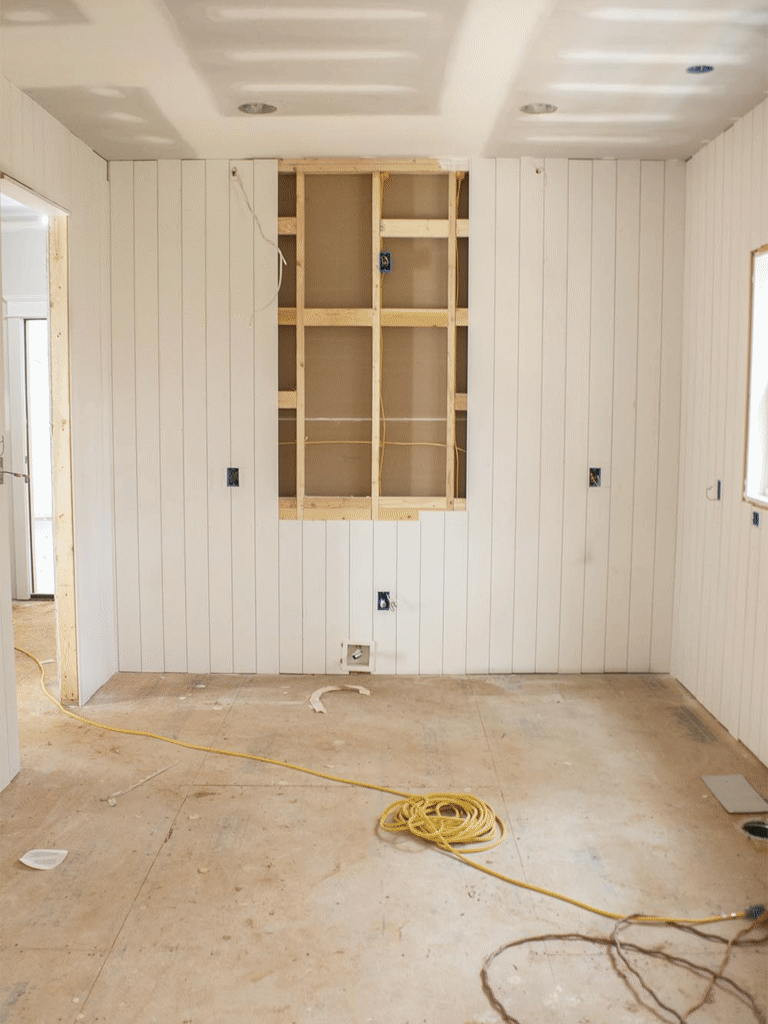
The main difference between these shelves and what we did in the dining room is that for the kitchen, we built the entire cabinet box before mounting it to the wall. In the dining room, we were mounting the cabinets to walls on each side. So, he mounted each side board to the walls and then the other pieces. He built it on the wall, so to speak, instead of building the entire cabinet first and then mounting them as he did here in the kitchen.
We installed wallboard on the kitchen walls and I wanted that to also be the back of the cabinets, so we just had to construct the sides and top.
Here’s how we built these cabinets in case you want to build some easy custom cabinets for yourselves!
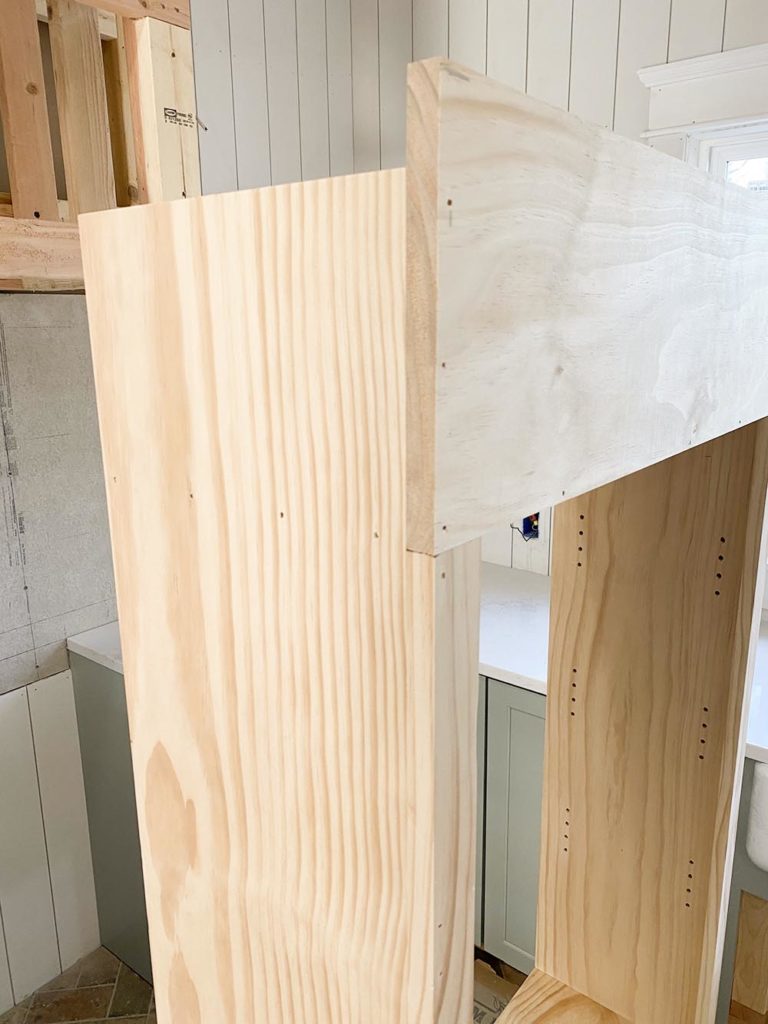
Step 1: Build the Shelf Sides
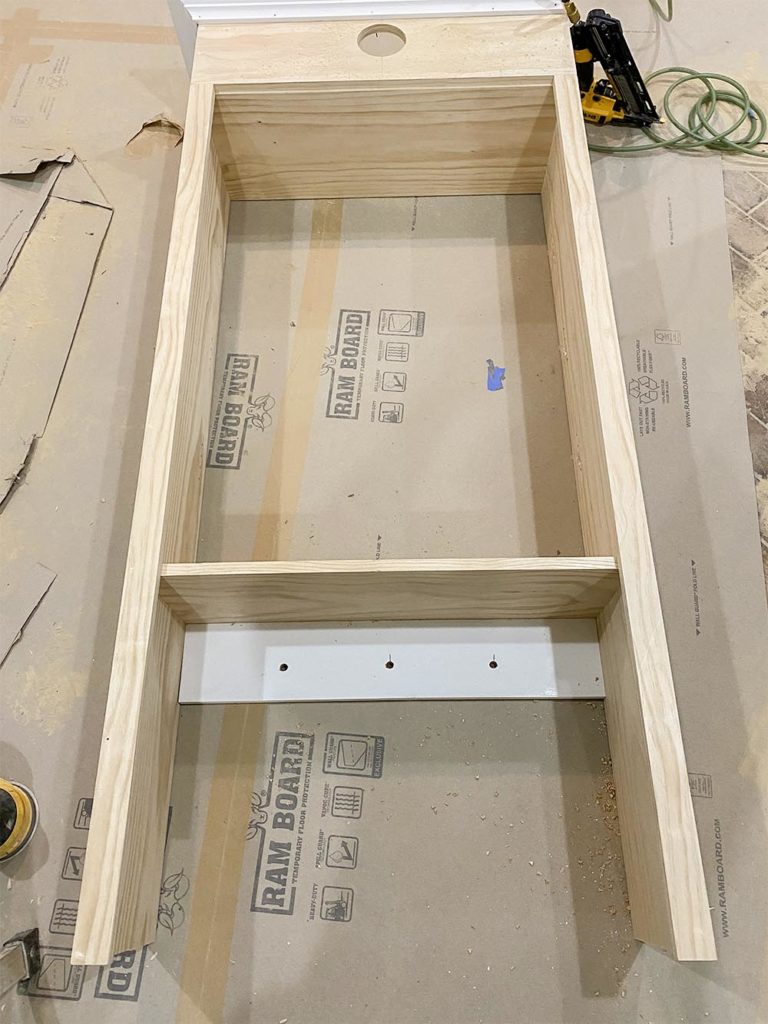
We used pine shelving boards to the construct the sides of each cabinet. We cut each board to the height we needed. I wanted them to run counter to ceiling, so that was 6′ in our case. Just like the dining room built-ins, we routed lines at the top and bottom where we wanted the top and bottom shelf for stability. These are 3/4″ since that’s the depth of our shelf boards.

I envisioned the bottom shelf being tall enough off the counter top to put small appliances, so that line is further from the end. The top shelf line is placed where our header will come down to once the shelves are trimmed in. You want this header board to be tall enough for your crown molding (but more on this to come below). This top shelf actually serves as the “ceiling” of the cabinet.
We hammered our top and bottom shelves into these router lines. Installing the shelves this verses just screwing them to the sides gives the cabinet a lot more structural integrity.
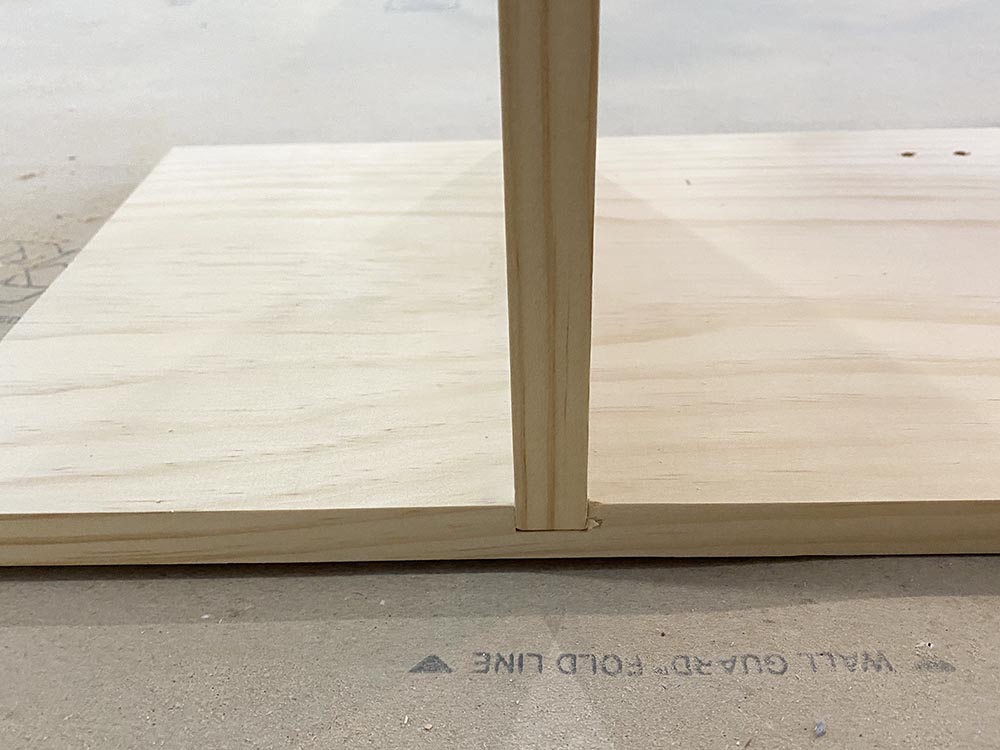
Then we secured them with nails from the outside.
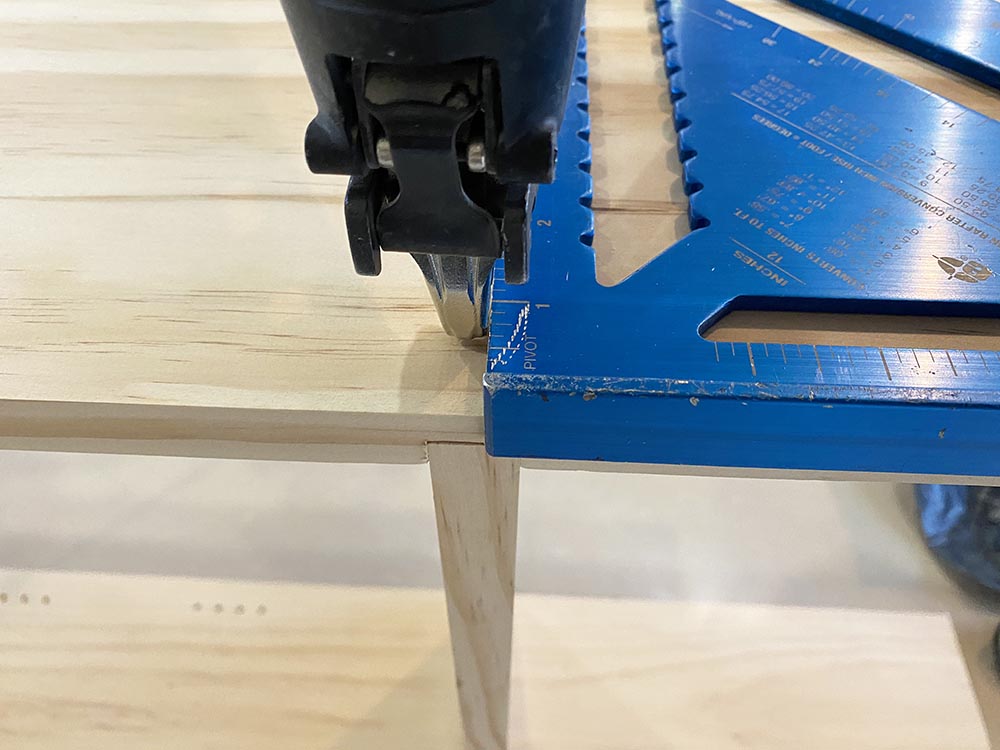
The top and bottom boards are stationary, where the other shelves are adjustable as you can see from the holes. We used a peg board to line up and drill even holes. Then, we got 1/4″ shelf brackets from Lowe’s to hang shelves in the holes.
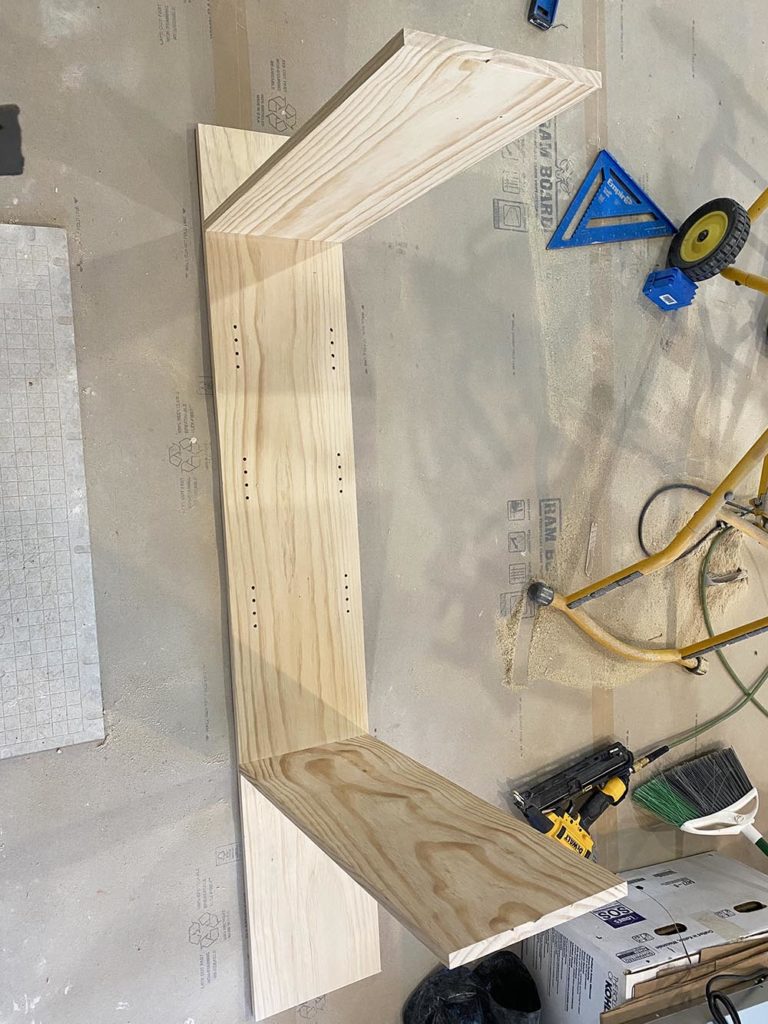
Step 2: Add the Trim Boards
We used the same pine shelving boards to add trim to the top. This piece was attached right where the top shelving board is. This is what our sconces and crown molding are mounted to. We installed 2″ boards on the front of the sides to serve as trim.
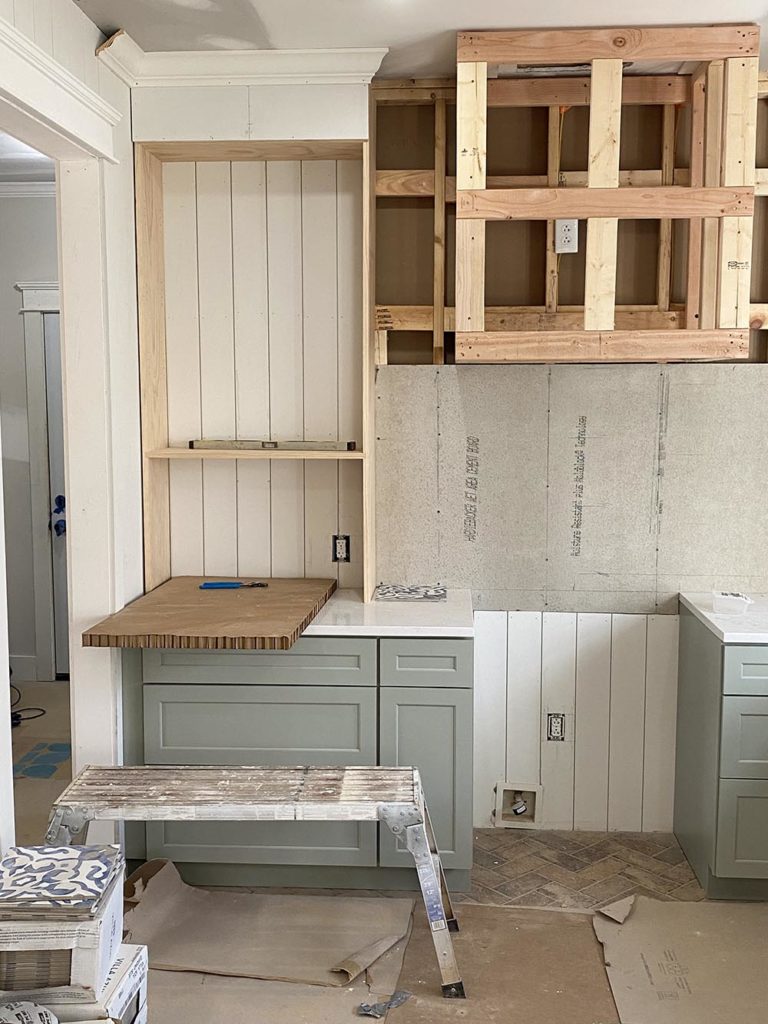
I haven’t talked yet about how we chose the size or width of these cabinets. It ended up being pretty straight forward! I knew I wanted a tiled hood with a tile panel around it. I didn’t want the cabinet to come right up to the hood, but wanted atleast 12″ of backsplash going to the ceiling around the hood. And I wanted the cabinets to be symmetrical and as large as possible. The hood was a fixed size, we added 12″ of a buffer around it and then built the cabinets to fit.
Once these were constructed on the ground, we sat them in place and screwed them to the side and back walls.
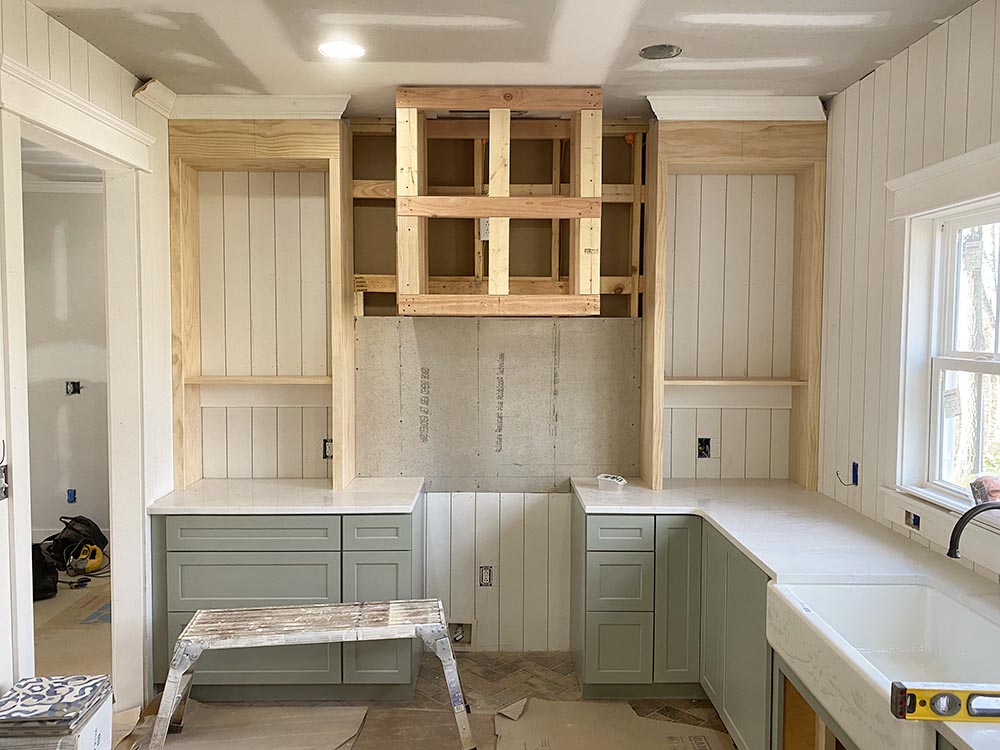
For the peg rails, we mounted a board just under the bottom shelf to the wall that my shaker pegs could attach to. We used the same Birch Dowel Pins as we did in the master bath. We drilled holes for them and glued them in place with wood glue.
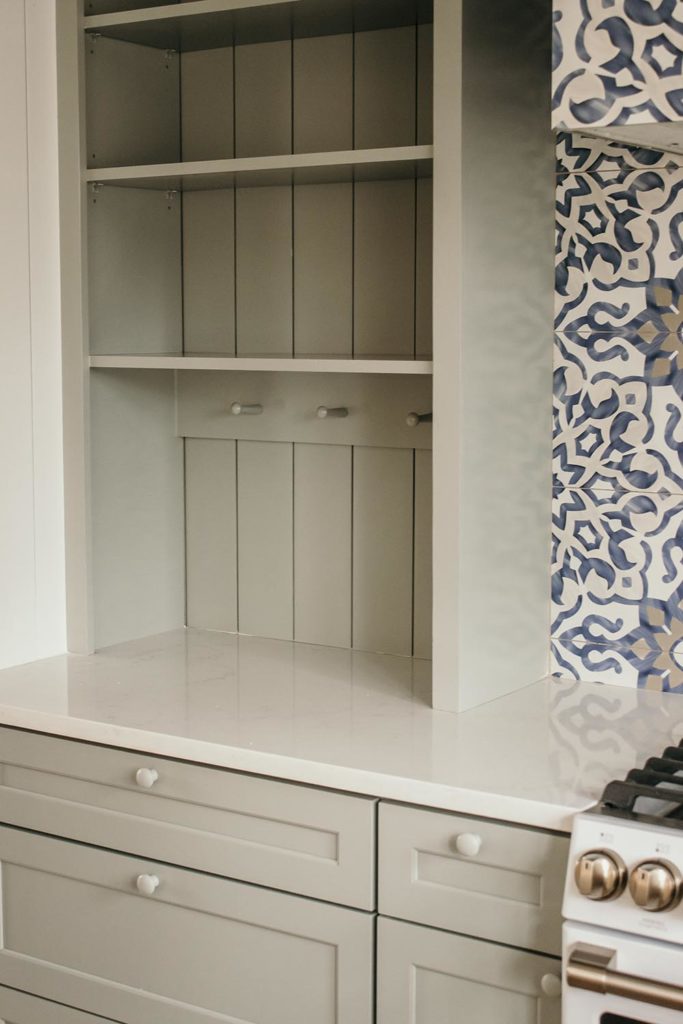
Once it was all installed, the cabinet boxes got primed and sprayed. The shelves were sprayed separately and then installed after everything was dry!
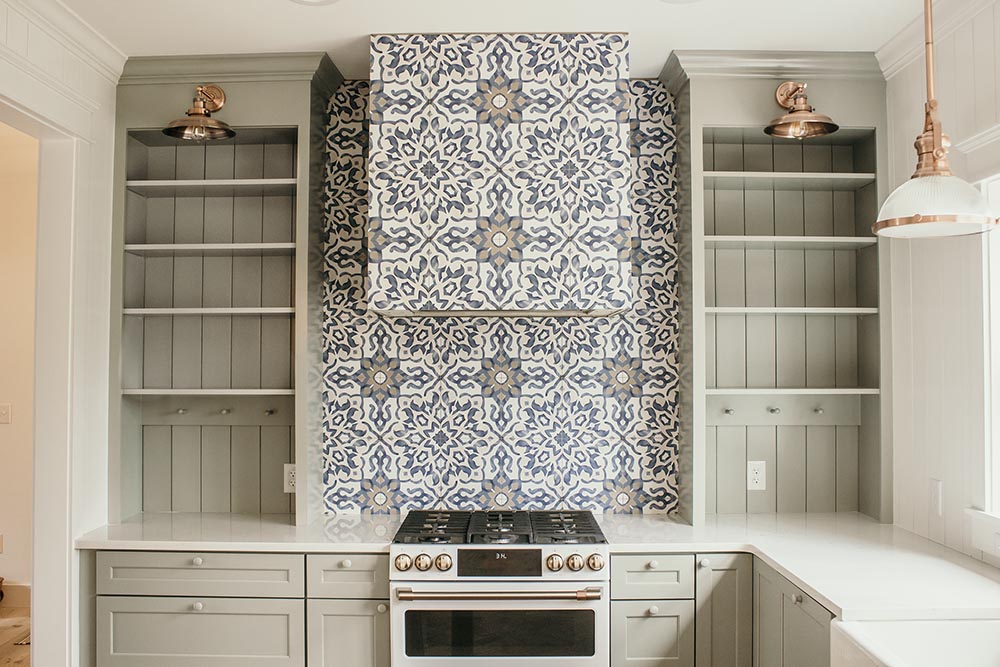
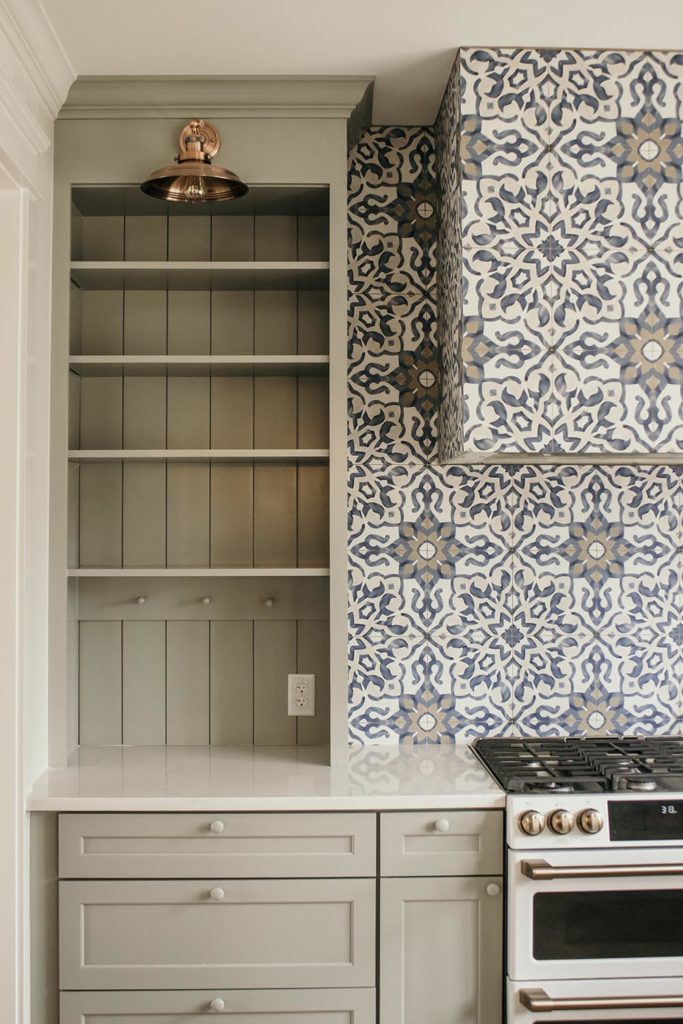
This view and these cabinets were the first thing I dreamed up for this house. And I love how they turned out! I love the function of all those shelves and pegs. But I also love visually how they take my beloved green, HGTV Home by Sherwin Williams Escape Gray, from counter to ceiling. I really love how they symmetrically flank that gorgeous blue and white tile. And I love how my copper sconces look against them and the light those cast down on these shelves!
Now, I’ve just got to finish settling, organizing, and styling this kitchen and a reveal is quickly on its way, friends! Can you picture these all styled and functional? I’m still moving things around, but here’s a little glimpse of some of the functional, but pretty ways I plan to use these…

