
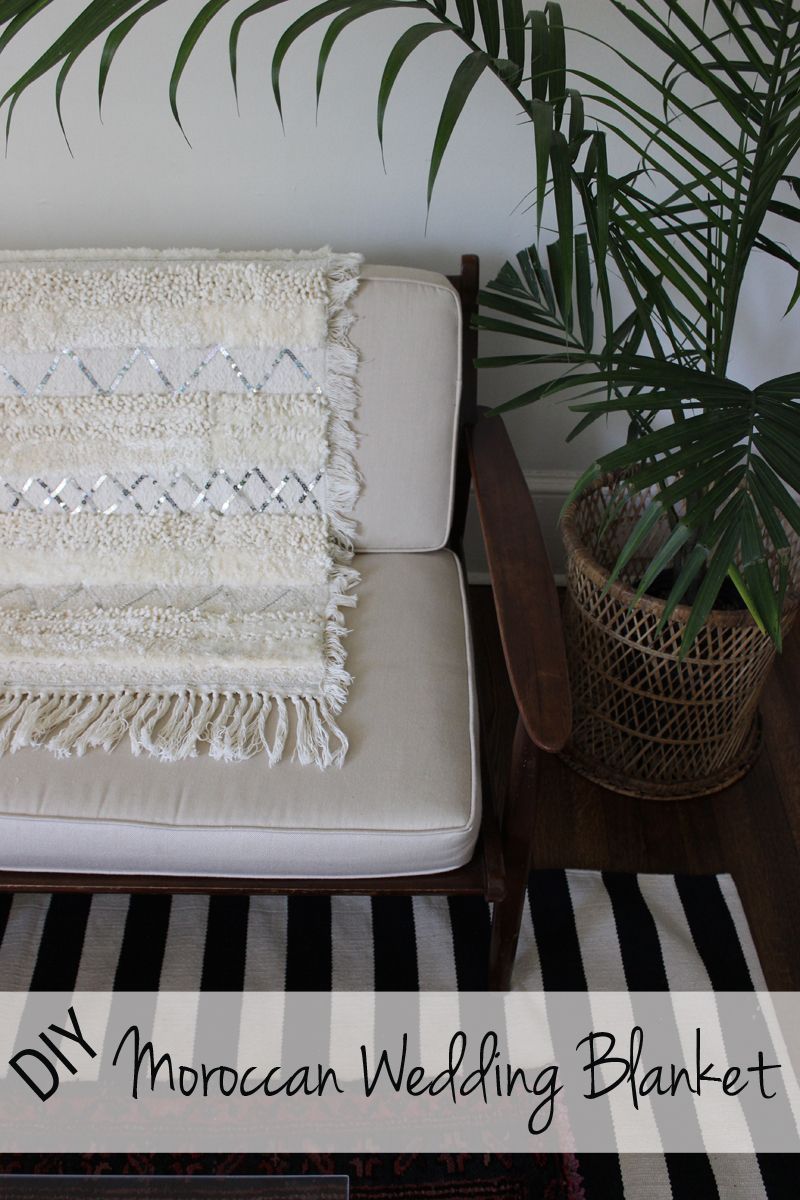
I love Moroccan Wedding Blankets. For so long, I’ve pinned living rooms that had them thrown across the couch and bedrooms where they adorned the foot of the bed.
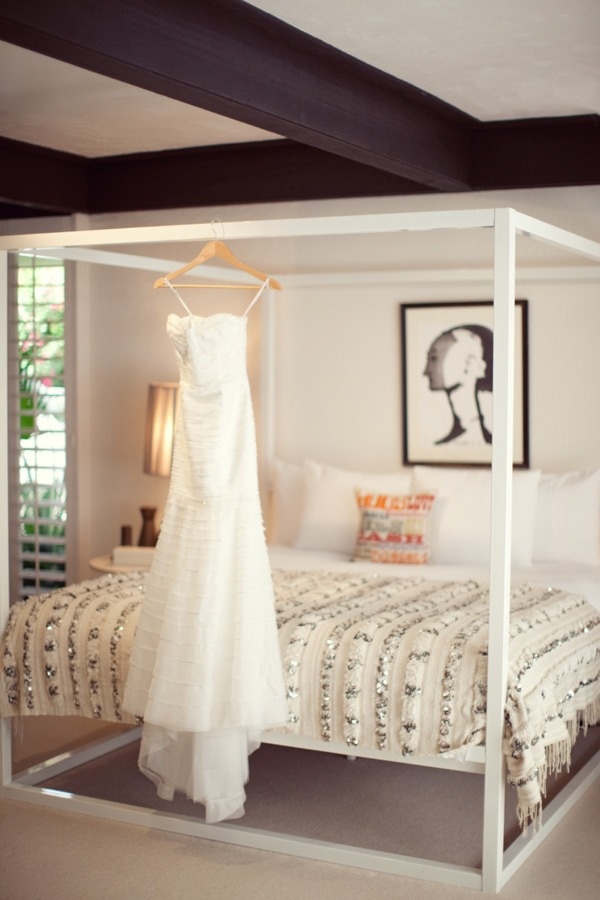
{via}
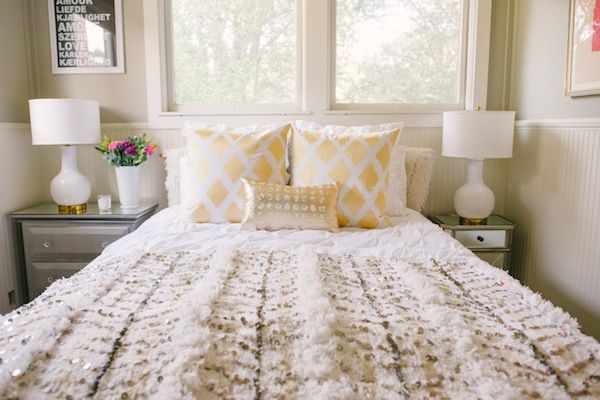
{via}
I’m all about the history behind pieces. I want them to have a soul. And these sure do, y’all! I recently learned the whole story behind these beauties and it made me want one even more.
In Morocco, these are called handira. They are woven out of sheeps’ wool, cotton, and linen by the bride’s female relatives. During the making of the blanket, the relatives teach the bride all about married life. And after the wedding, the bride ties the blanket around her neck and takes it to her new home (history paraphrased from here.)
But when that history and soul costs $900, it ain’t gone happen, y’all.
I knew I could get this look for less and I’ll just remember that lovely back-story every time I look at it. I made this blanket for Round 3 of Creating with the Stars and am so excited to share the tutorial here with you all!
I had seen a lot of variations, but all of them usually have the strips of shag. Inspiration struck one day when I saw a cheap, shag bathmat. And that was all she wrote!
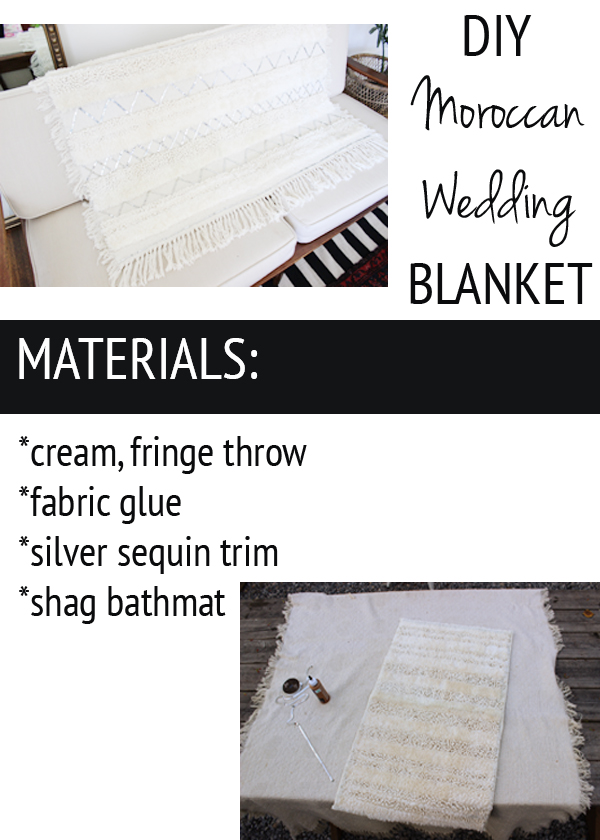
Here are a few more details about materials:
Throw – You need to start with a throw as your base. This throw was an old one that had just been sitting in the house for years. It really wanted one that already had fringe trim around the outside since many of the blankets I’d seen have fringe. Plus, I just love fringe.
Glue – Yes, this blanket was completely glued together. We used fabric glue. I don’t think regular glue would hold as well.
Sequin Trim – My first thought was that I was going to have to glue on tiny sequins by hand. That wasn’t very exciting. Thankfully, I found sequin trim, which made this process really easy! Any craft store should have it.
Shag Bathmat – Here is where you can really customize your blanket. You definitely want shag so that there is some texture standing up off of the blanket, but the pile is up to you! I found one that had stripes of different shags, which I loved because it provided more variety and texture in the blanket.
Make sure to buy your throw first (or measure an old one that you have at home), so that you can calculate how many bath mats it will take to fully cover it in strips. For my throw, it took three bath mats.
Once you have your materials, get crafting!
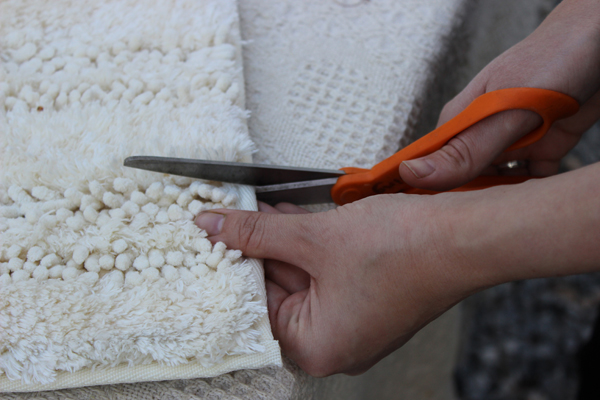
Step 1: Cut Your Strips
You don’t just want to start cutting on this part. I realized this the hard way.
Depending on your mat, when you just start cutting, some of the shag falls out. Since mine had different textures, I realized that I could separate the pile between stripes where I could cut directly on the mat. This way, I didn’t lose fibers when I cut.
Step 2: Place Your Strips on Throw
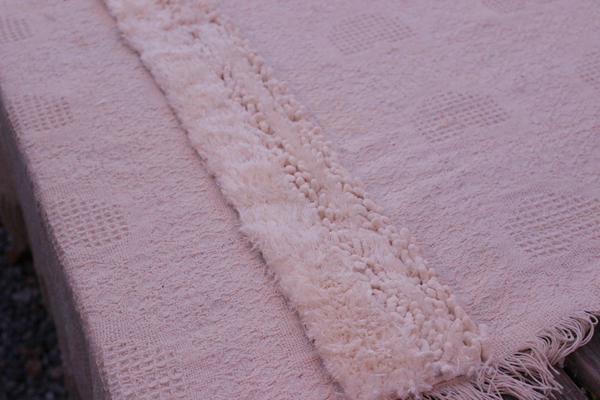
You can really customize the look of your blanket here. My throw had rows of hearts. Do you see them in the picture above? That wasn’t the feel I was going for, so I decided to cover each row of hearts with a strip. This meant that my strips were close together, which I loved because it provides more texture.
My bathmat was 1.5′ wide, so each strip was only 1.5′ long. I needed my strips to run the entire length of the throw, so for mine, 2.5 strips filled up the entire throw. I laid them end to end and with the shag, you don’t even notice the seams between them.
Once you have your plan for where to place your strips, get to gluing!
Step 3: Glue Strips Down
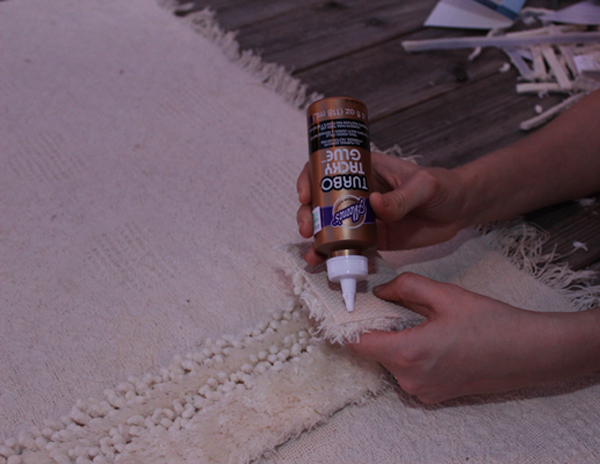
This part takes time, but is really easy. Run glue along the sides. Press firmly onto the blanket and hold in place for a minute.
Be careful as you’re starting to glue other rows not to knock ones you’ve already glued down. It takes a bit for them to set.
Step 4: Add the Sequins!

This is the fun part! You can really customize your blanket with choosing different sequin patterns for each row.
I chose to do different patterns on mine. I laid the strips out first and decided on my pattern. Then, I carefully ran glue onto the trim and pressed it into place.
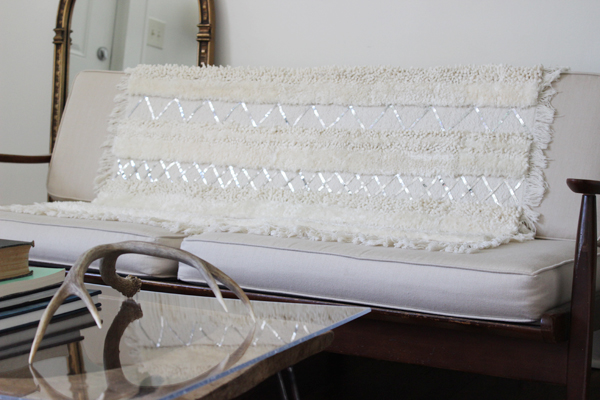
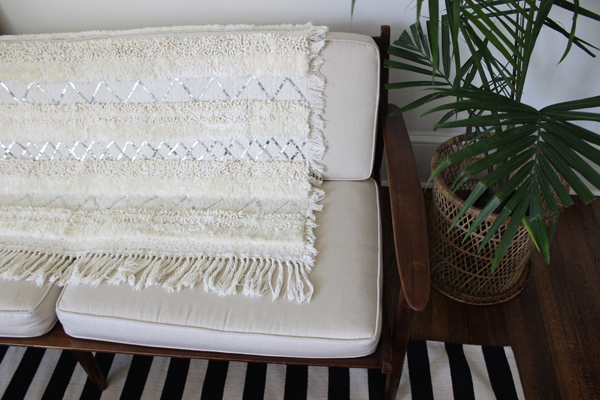
I’m loving my finished blanket! It adds so much texture to the room.
I know some of y’all have asked about the remaining tutorials from CWTS. I promise they are coming, y’all! The broken SD card was a little hiccup along the way, but I’m recovering and fitting them in.
I’m counting down the days until I can do this full-time and have posts at least every day! Finishing up school and maintaining the blog has proven so much more difficult than I expected. But, 11 school days and counting! I can’t wait to really give The White Buffalo my all. Thanks for all of your encouragement, patience, and love along this journey!
***
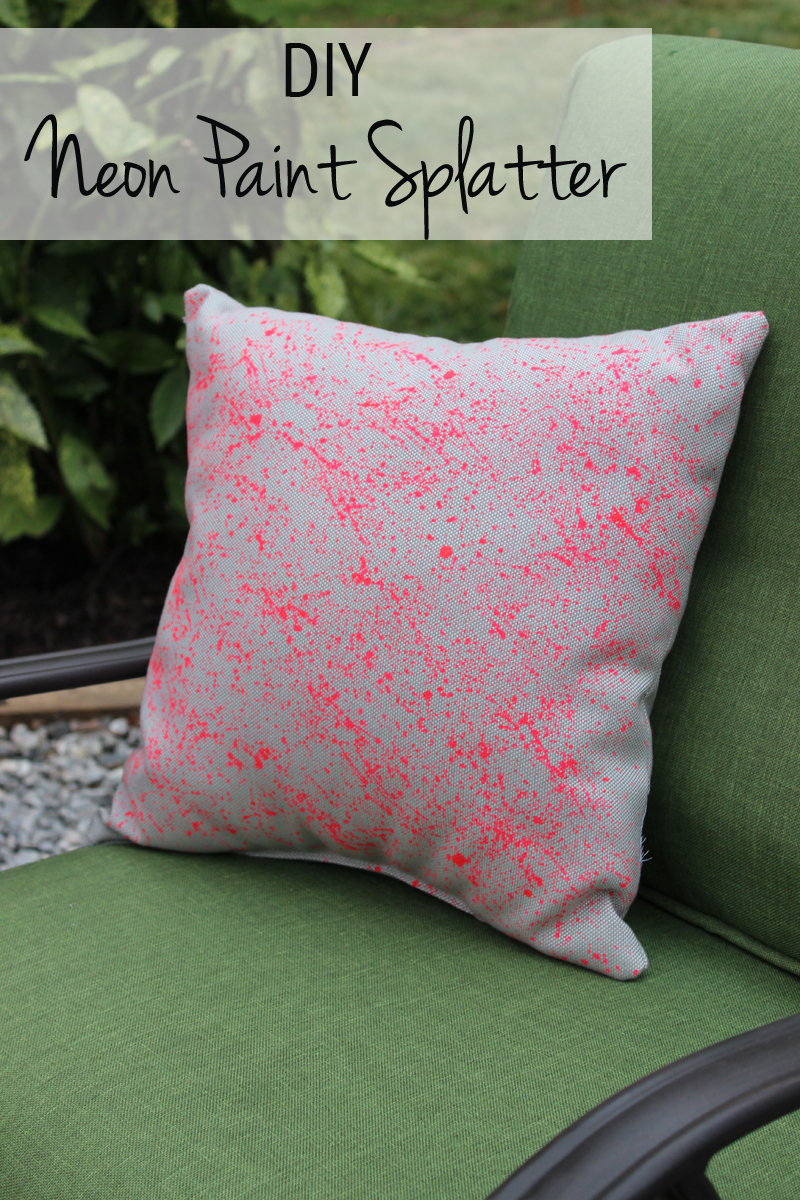
I’m over on Makely Home today sharing how I created this neon paint splatter pillow in two steps using a single can of spray paint.

what a neat history behind them, now I want one too!
I know, right? That made me love the look even more, Bethany!
I love this!
Thanks Caroline!
LOve the look of them and you did a fabulous job recreating the look.
Thanks Julia 🙂 I’m loving it so much!
I love your DIY version- so much better that it can be customized to whoever is making it!
So true Beth! I’ve seen some that are much heavier sequins or different textures – you could customize it to whatever you love! Plus, you could customize the size to your space.
This was one of my favorites – love the boho-glam-cozy vibe!
Thanks Jennifer! I love that…boho, glam, cozy!!! Maybe that’s my new style name 🙂
I love how this looks! Can you tell me how it’s holding up so far? (Do you think it’s a usable blanket, or a “lookie” blanket?)
Hi Kelly! Great question! It’s holding up great! The fabric glue is extremely durable and has held in place great. Bath mats are made to be really durable too, so I think that helps. We have it thrown over the couch and we lounge on it and it’s just like new!
Love this! All kinds of ways to personalize/customize it too. Thank you for the tutorial!
Thank you, Sharon! I’m so glad that you love it. I do too!
Love this project Lindsay! So so much! Great idea to hack that blanket 🙂
Obviously I have to make this now. I love how simple/easy to do your DIYs are, but the end result looks so nice! That was phrased weird, but recap: Simple and expensive-looking end result!
Oh my goodness. I saw this on instagram when you posted it, and have been meaning to come by since then. I’m so glad I did! I have got to make this. You are a diy queen! I love how you make the projects seem simple and approachable, rather than overwhelming (for a non-frequent diy-er). Can’t wait to finally have this look in our house!!!
Hey Lindsay! Just curious, where did you get your bath mats? I’ve been searching around for some textured bath mats but haven’t been as fortunate as you!!
Thanks- Caro
I really love this!! Thanks so much!!
Hey I was curious where you found your bath rug and the dimensions of your blanket. It looks great!
Natalie, the bath rug is from a place called Old Time Pottery. I think it’s a chain? The blanket is 4 x 6!
Lindsay this wedding blanket is so gorgeous, I cannot believe you came up with this amazing idea!! Brava!!
xoxo
Karena
The Arts by Karena
Thank you so much, Karena!!! I had a vision for it,b ut really thought, “This may look cheap or stupid, haha.” I’m so thankful it turned out!
I love decorating with Moroccan Wedding Blanket. You made an affordable version as the real ones are really pricey as they are all hand woven. I invite you to check out my post these Gorgeous & Trendy Decorating Ideas and Inspirations http://bit.ly/200Mlrq
I love decorating with Moroccan Wedding Blanket. You made an affordable version as the real ones are really pricey as they are all hand woven. I invite you to check out my post with Decorating Ideas and Inspirations using Moroccan Wedding Blanket http://bit.ly/200Mlrq
I just love this! How clever you are. Question……do you this will hold up to a washing? I’ve used the iron on glue tape on curtains and have washed them many times (even dried them in the dryer) but have never tried washing anything with the glue,
Mari, I don’t know! I actually haven’t tried to wash it. No spills so far and it doesn’t get a ton of wear. I bet fabric glue bottles say whether or not it can be washed? I don’t still have mine, but I’ll have to look into that. Great question!
I love your DIY project!!!! I’m featuring it on my blog post today! I’m including great globally inspired projects with red, white, and blue. http://casawatkinsliving.com/2016/07/ten-great-global-red-white-and-blue-diy-projects/
Lovely! I want to do one as a tapestry/wall hanging. Should I use some type of lighter weight substrate?
Hi Robin! I definitely think you could hang this, but I think it’d be easier with a lighter cloth than this heavy woven throw!